
Teach a Class
Share Your Screen
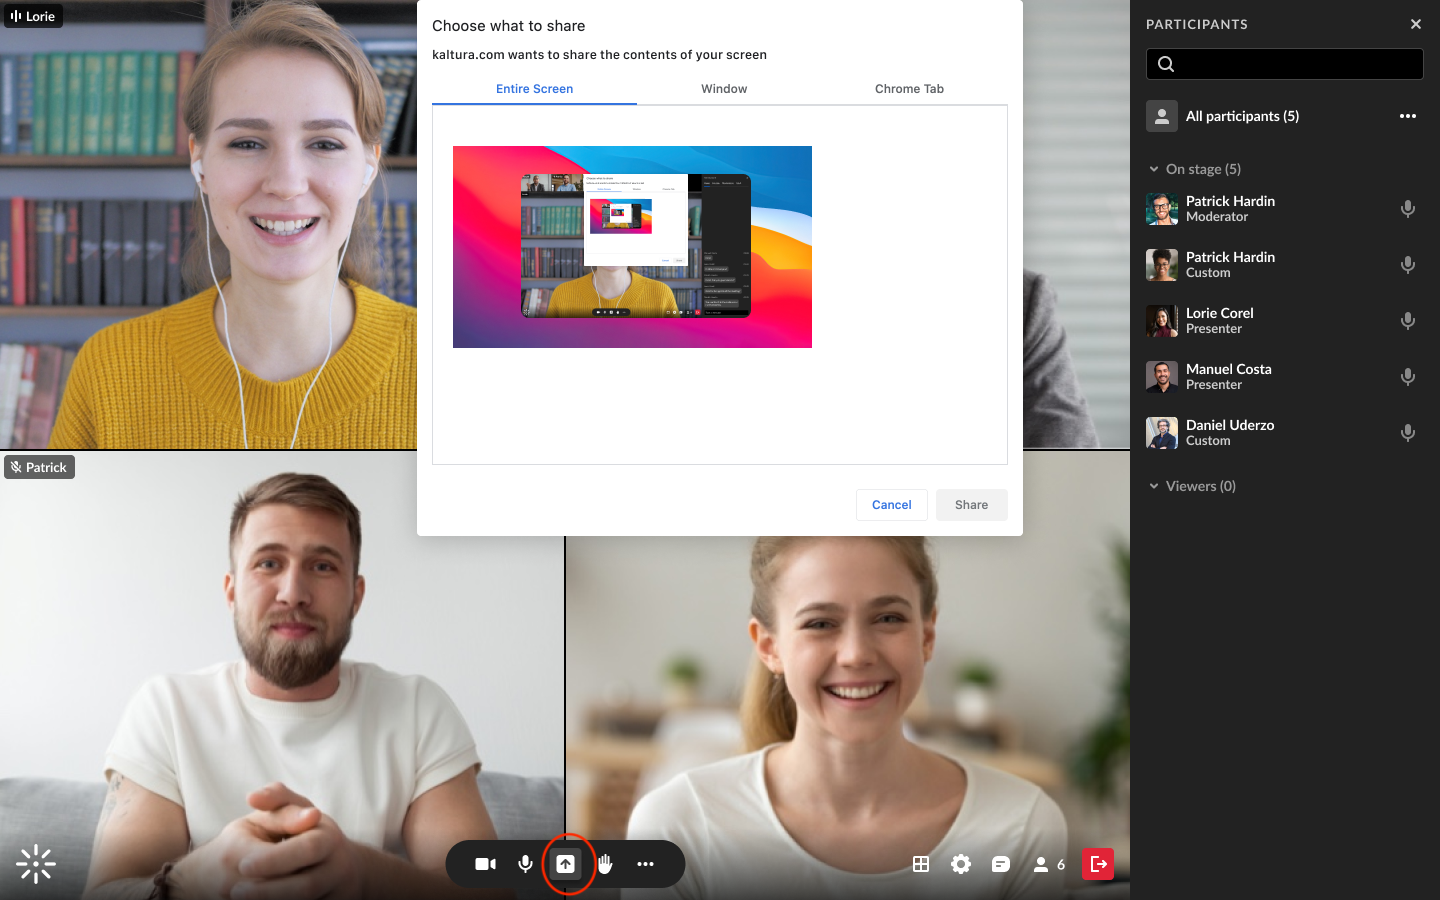
Sharing screens is a default permission for hosts and moderators, and can also be custom enabled for participants on an individual basis. With this feature, you can choose to share your entire screen, a select window or select tab, whether you are a viewer in the room or already a presenter on stage.
- Click the screen share icon on the bottom toolbar. A screen sharing source menu will display with options of what you can share:
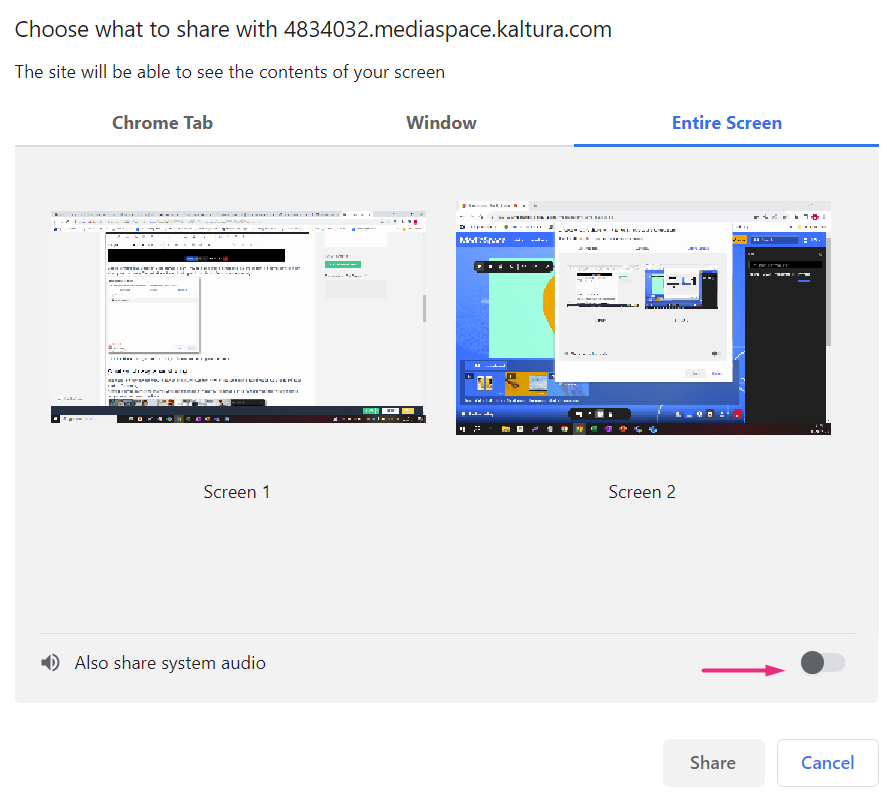
- Entire Screen - Shares whatever is displayed on your screen, and gives the most flexibility to move between windows and applications while maintaining your screen share. If you have multiple screens, you can choose which screen to share.
- Window - Select which particular application or window you’d like to share. Once shared, the application or window can’t be hidden or minimized.
- Tab - Choose a specific tab within your current browser.
- Click on the specific screen, window, or tab that you’d like to share.
You can also enable share system audio at the bottom of the screen sharing source menu (Google Chrome and Microsoft Edge browsers only). This will share the audio along with the visual of what you are sharing.
NOTE: Not all browsers allow system audio sharing. It’s only supported when sharing a browser tab or application window, and is currently available in Google Chrome and Microsoft Edge.
To see what shows while screen sharing or for more detailed information about this took, visit the Share you screen in a Kaltura Room in Video Portal page on the Kaltura Knowledge Center website or view this PDF.
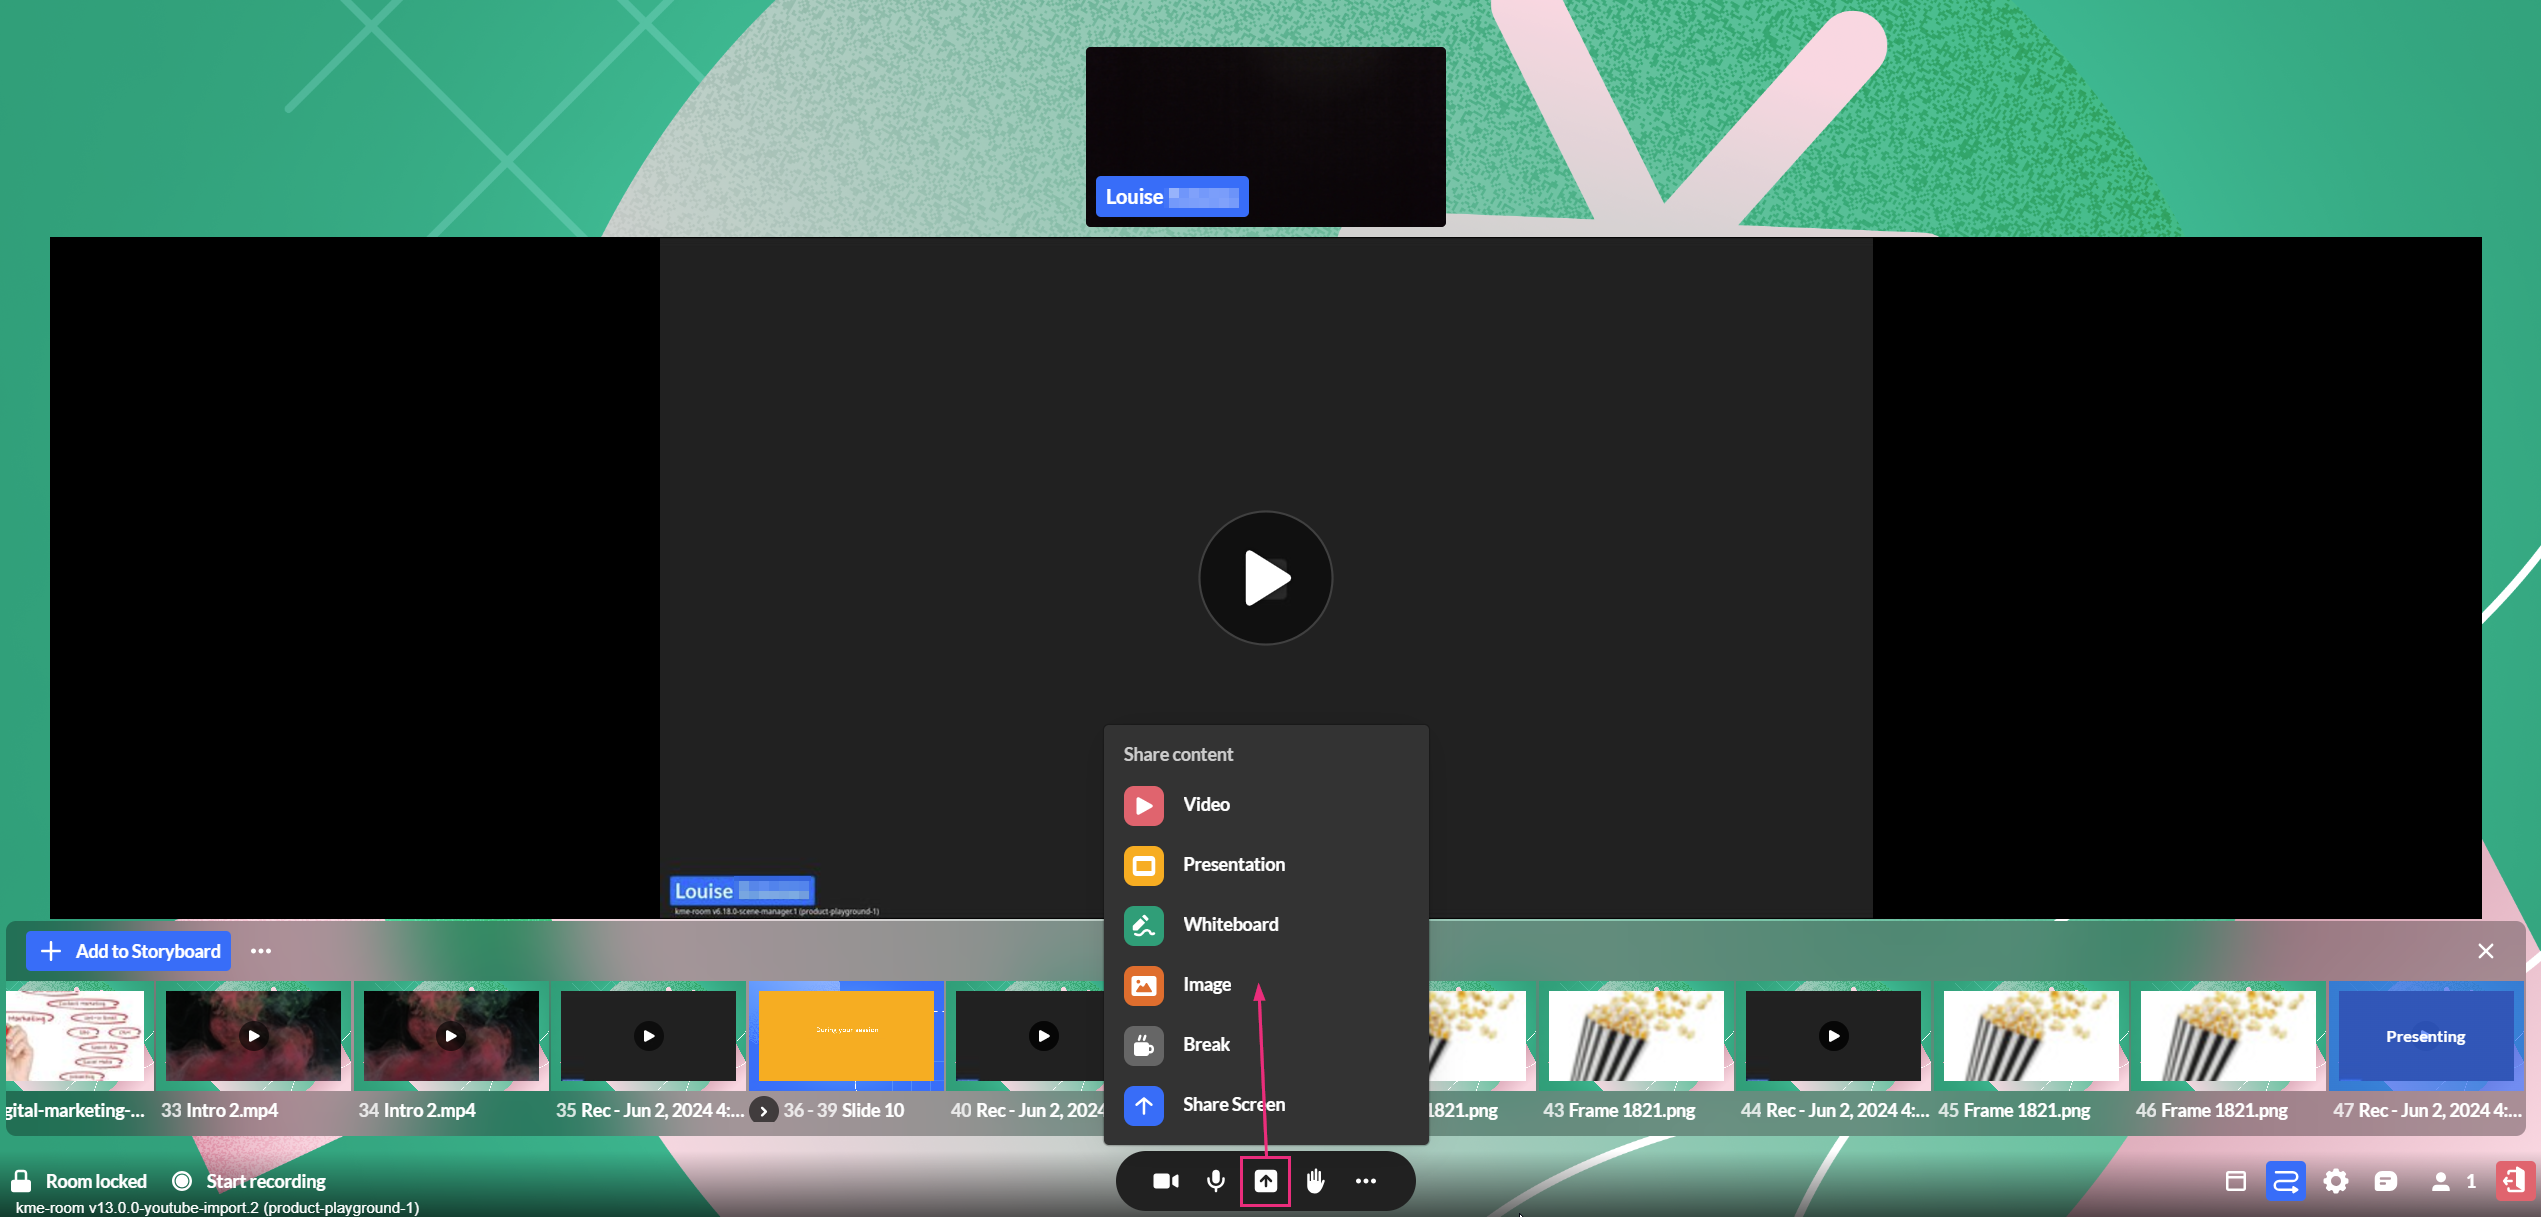
Share Media (Video, Presentation or Image)
- Click the Share icon on the bottom toolbar. Three options display for sharing media: Video, Presentation or Image.
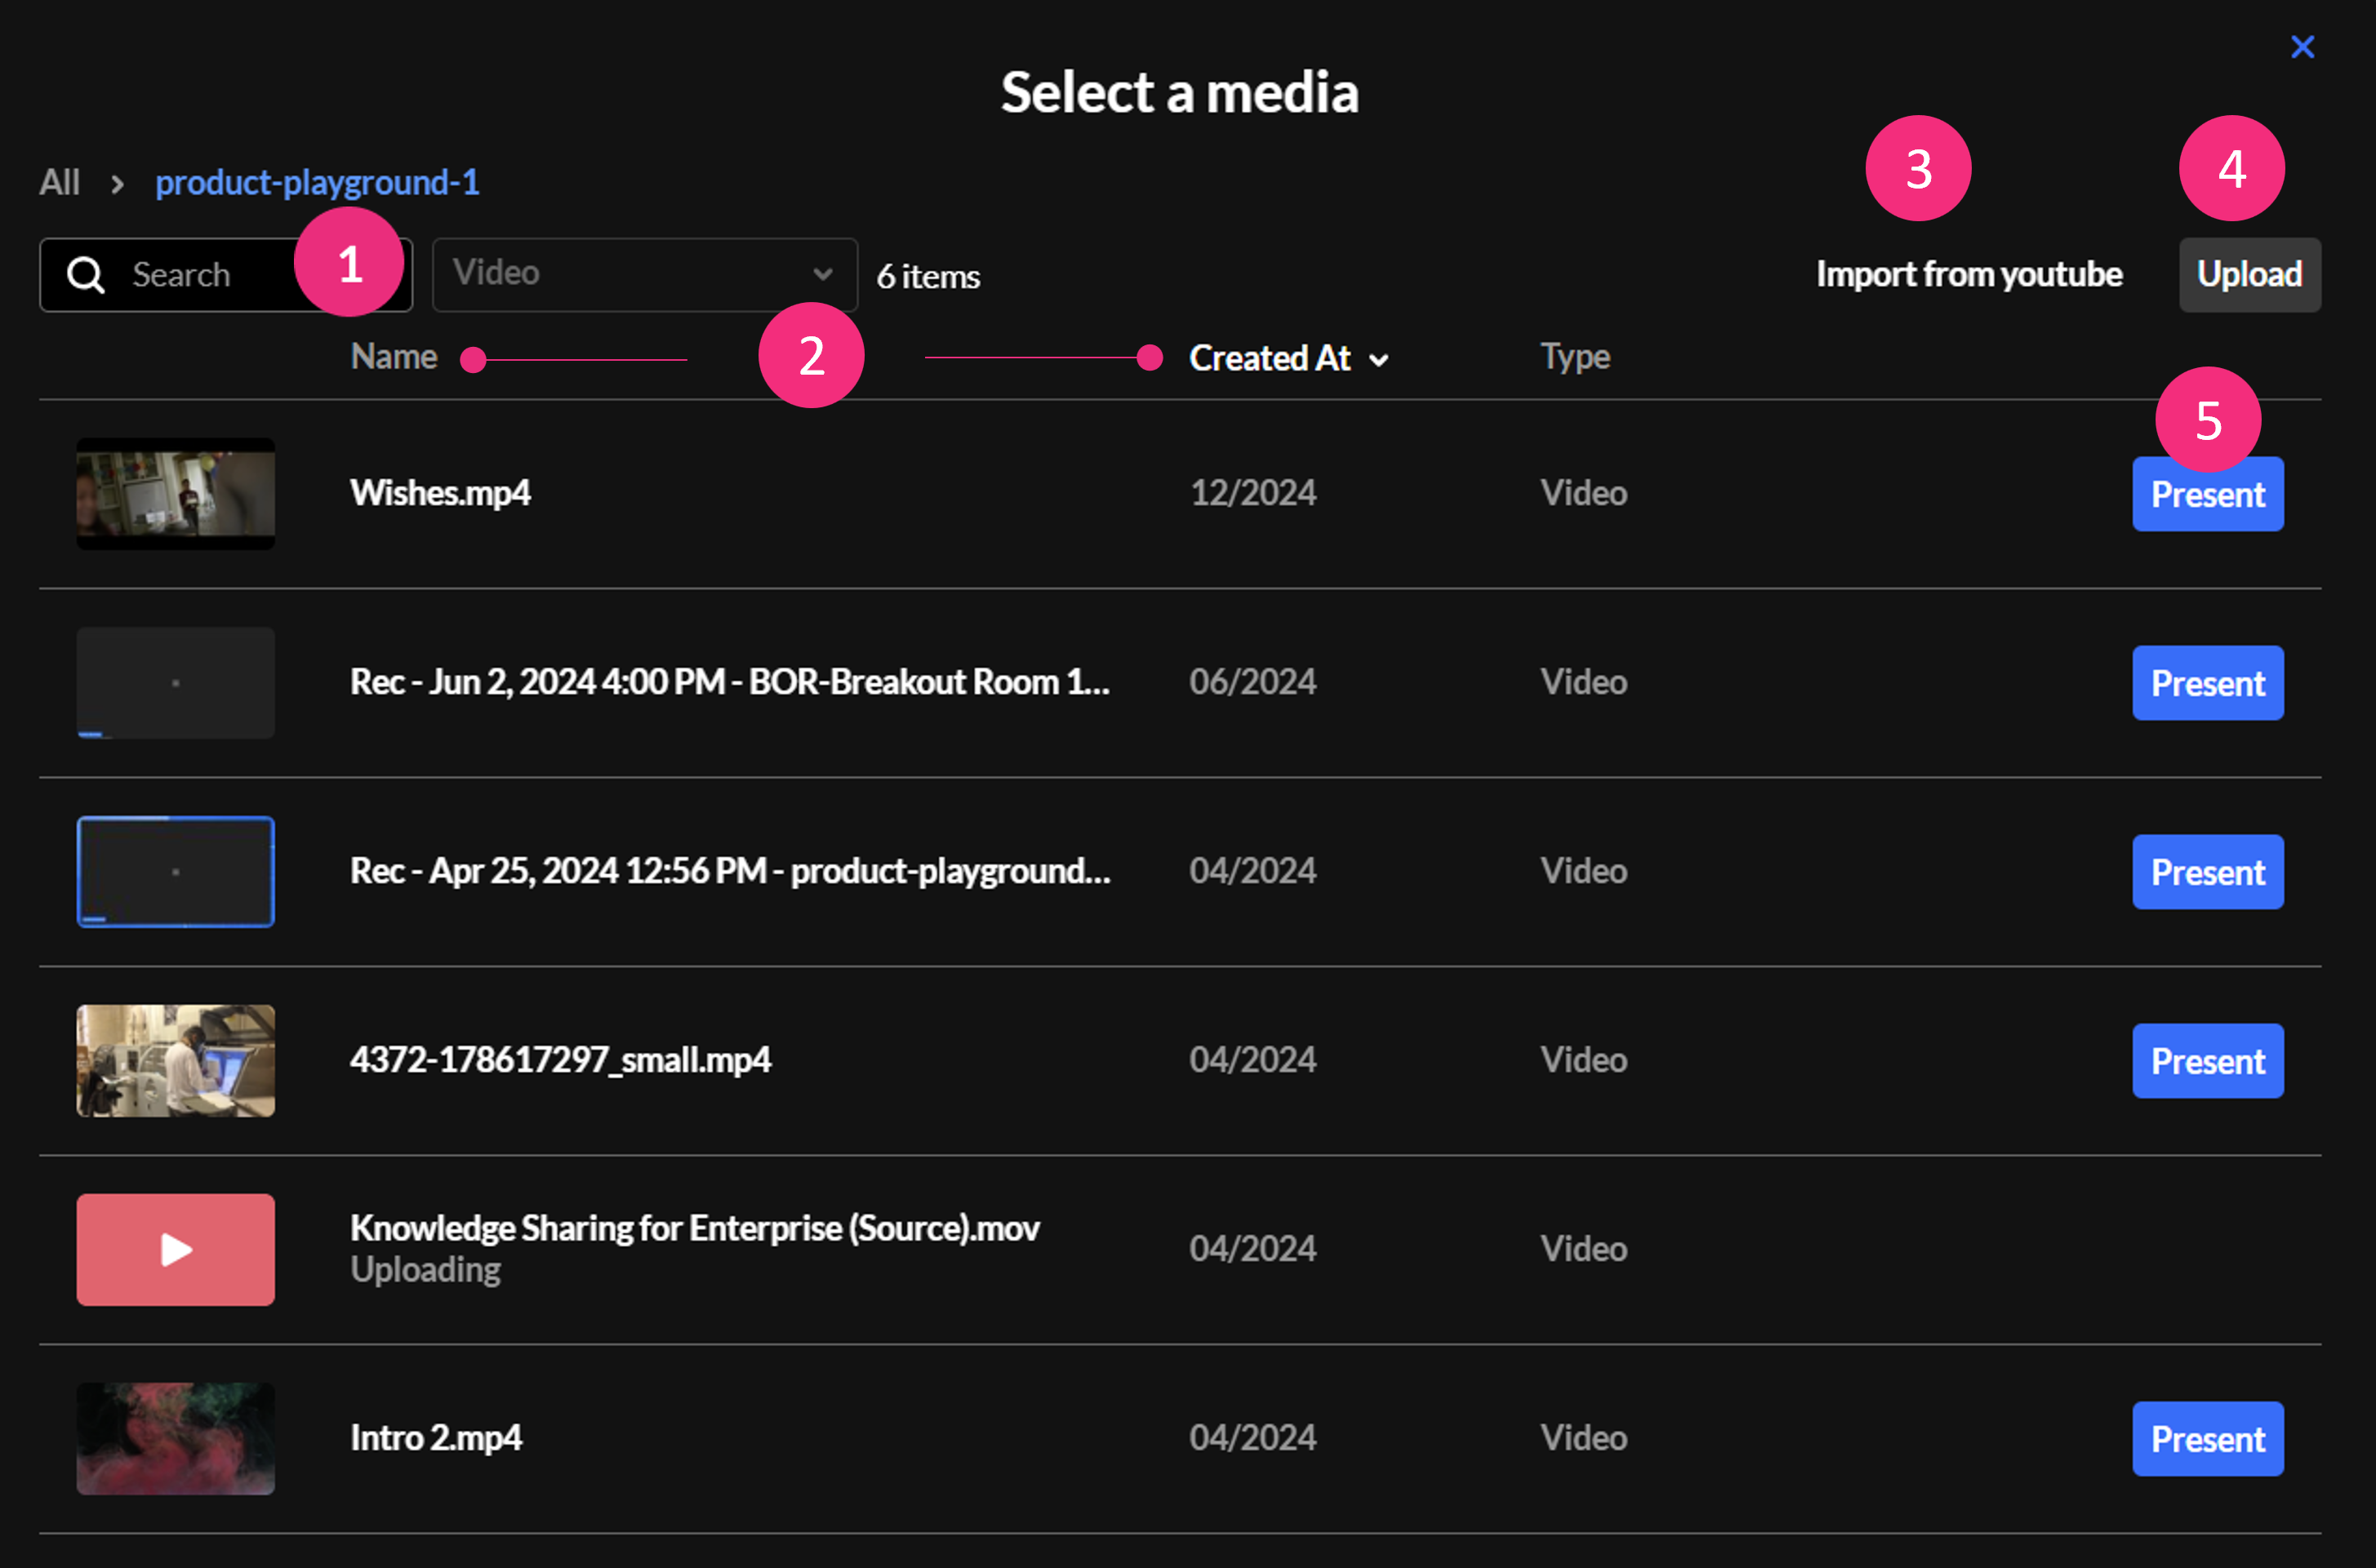
- Selecting one of the three options displays the Select a media window, which has the following features.
- Search — Use to search for a specific media item in the media manager.
- Name / Created At — Use to sort media items according to name / creation date.
- Import from YouTube (visible only for Video) — Click to import a YouTube video.
- Upload - Click to upload a video from your computer.
- Present — Click to add the media to the storyboard and start presenting it immediately (the Select a media window will close automatically).
For more detailed information visit the Scene manager in Kaltura Rooms webpage on the Kaltura Knowledge Center site or view this PDF.
Breakout Sessions
Breakout rooms are a great tool for dividing participants into smaller groups. They enhance collaboration in activities like workshops, group assignments, or focused discussions.
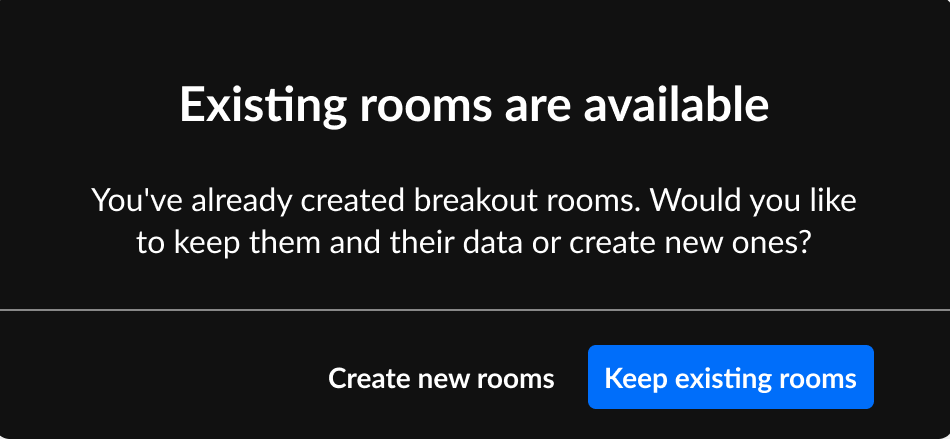
- Click the three dots on the bottom toolbar and select Breakout. If you have already created rooms, a pop-up will ask if you’d like to use your existing rooms or create new rooms:

- When creating new rooms, you’ll see the Start breakout rooms window display with options to:
- Set number of breakout rooms — up to 15 rooms
- Assign participants — up to 50 participants per room
- Set rooms time limit (optional) — after the time limit, the breakout rooms close and all participants are sent back to the main room.
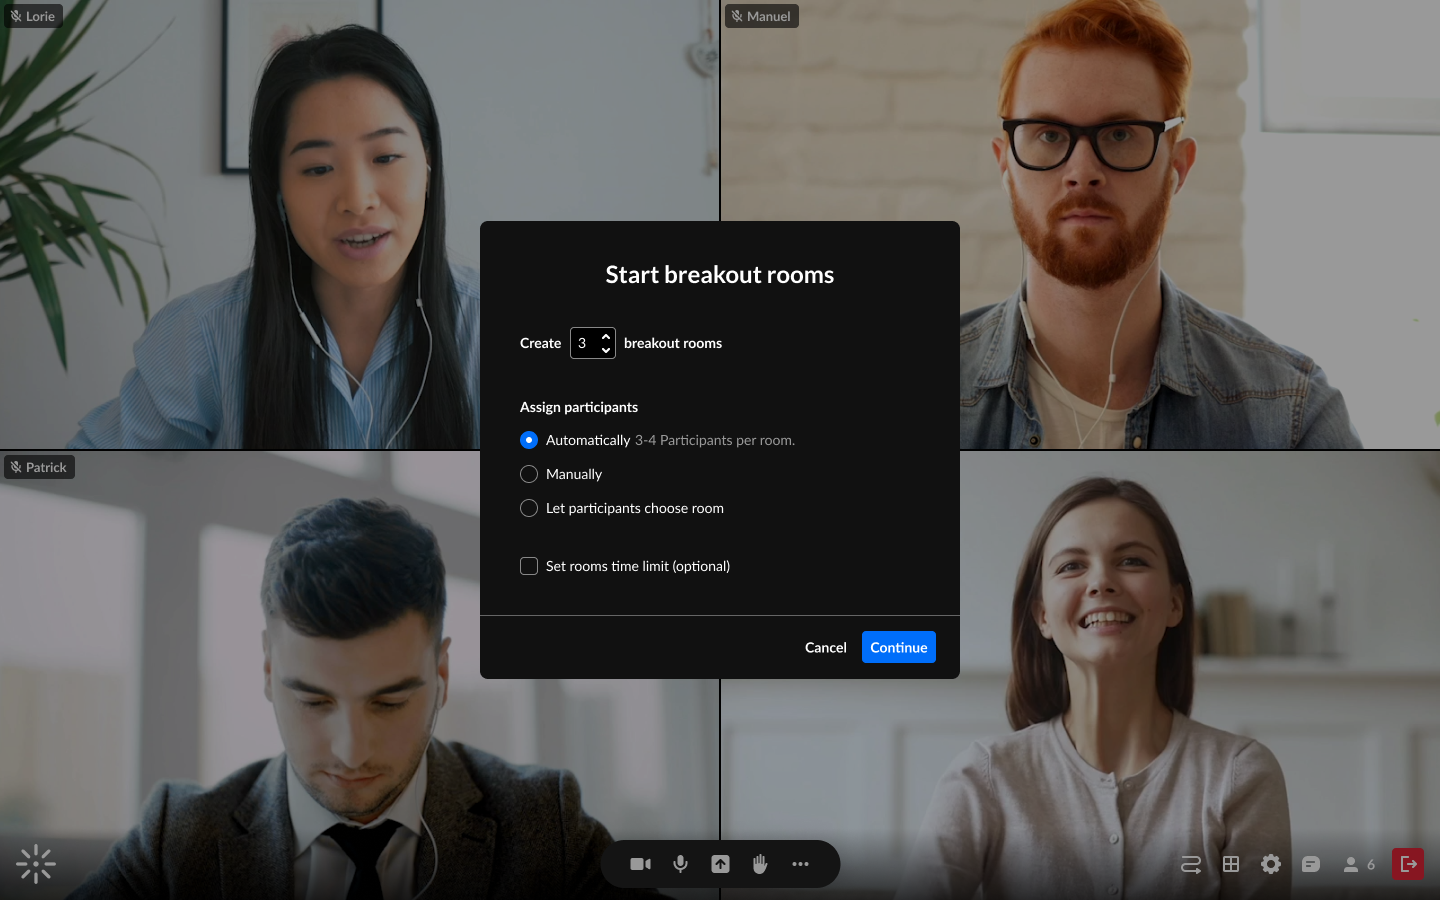
Click Continue. The Breakout Rooms dashboard will display.
- The dashboard is where you can prepare and manage your breakout session. Here you can add, rename and delete rooms, as well as assign participants in a variety of ways, among other functions.
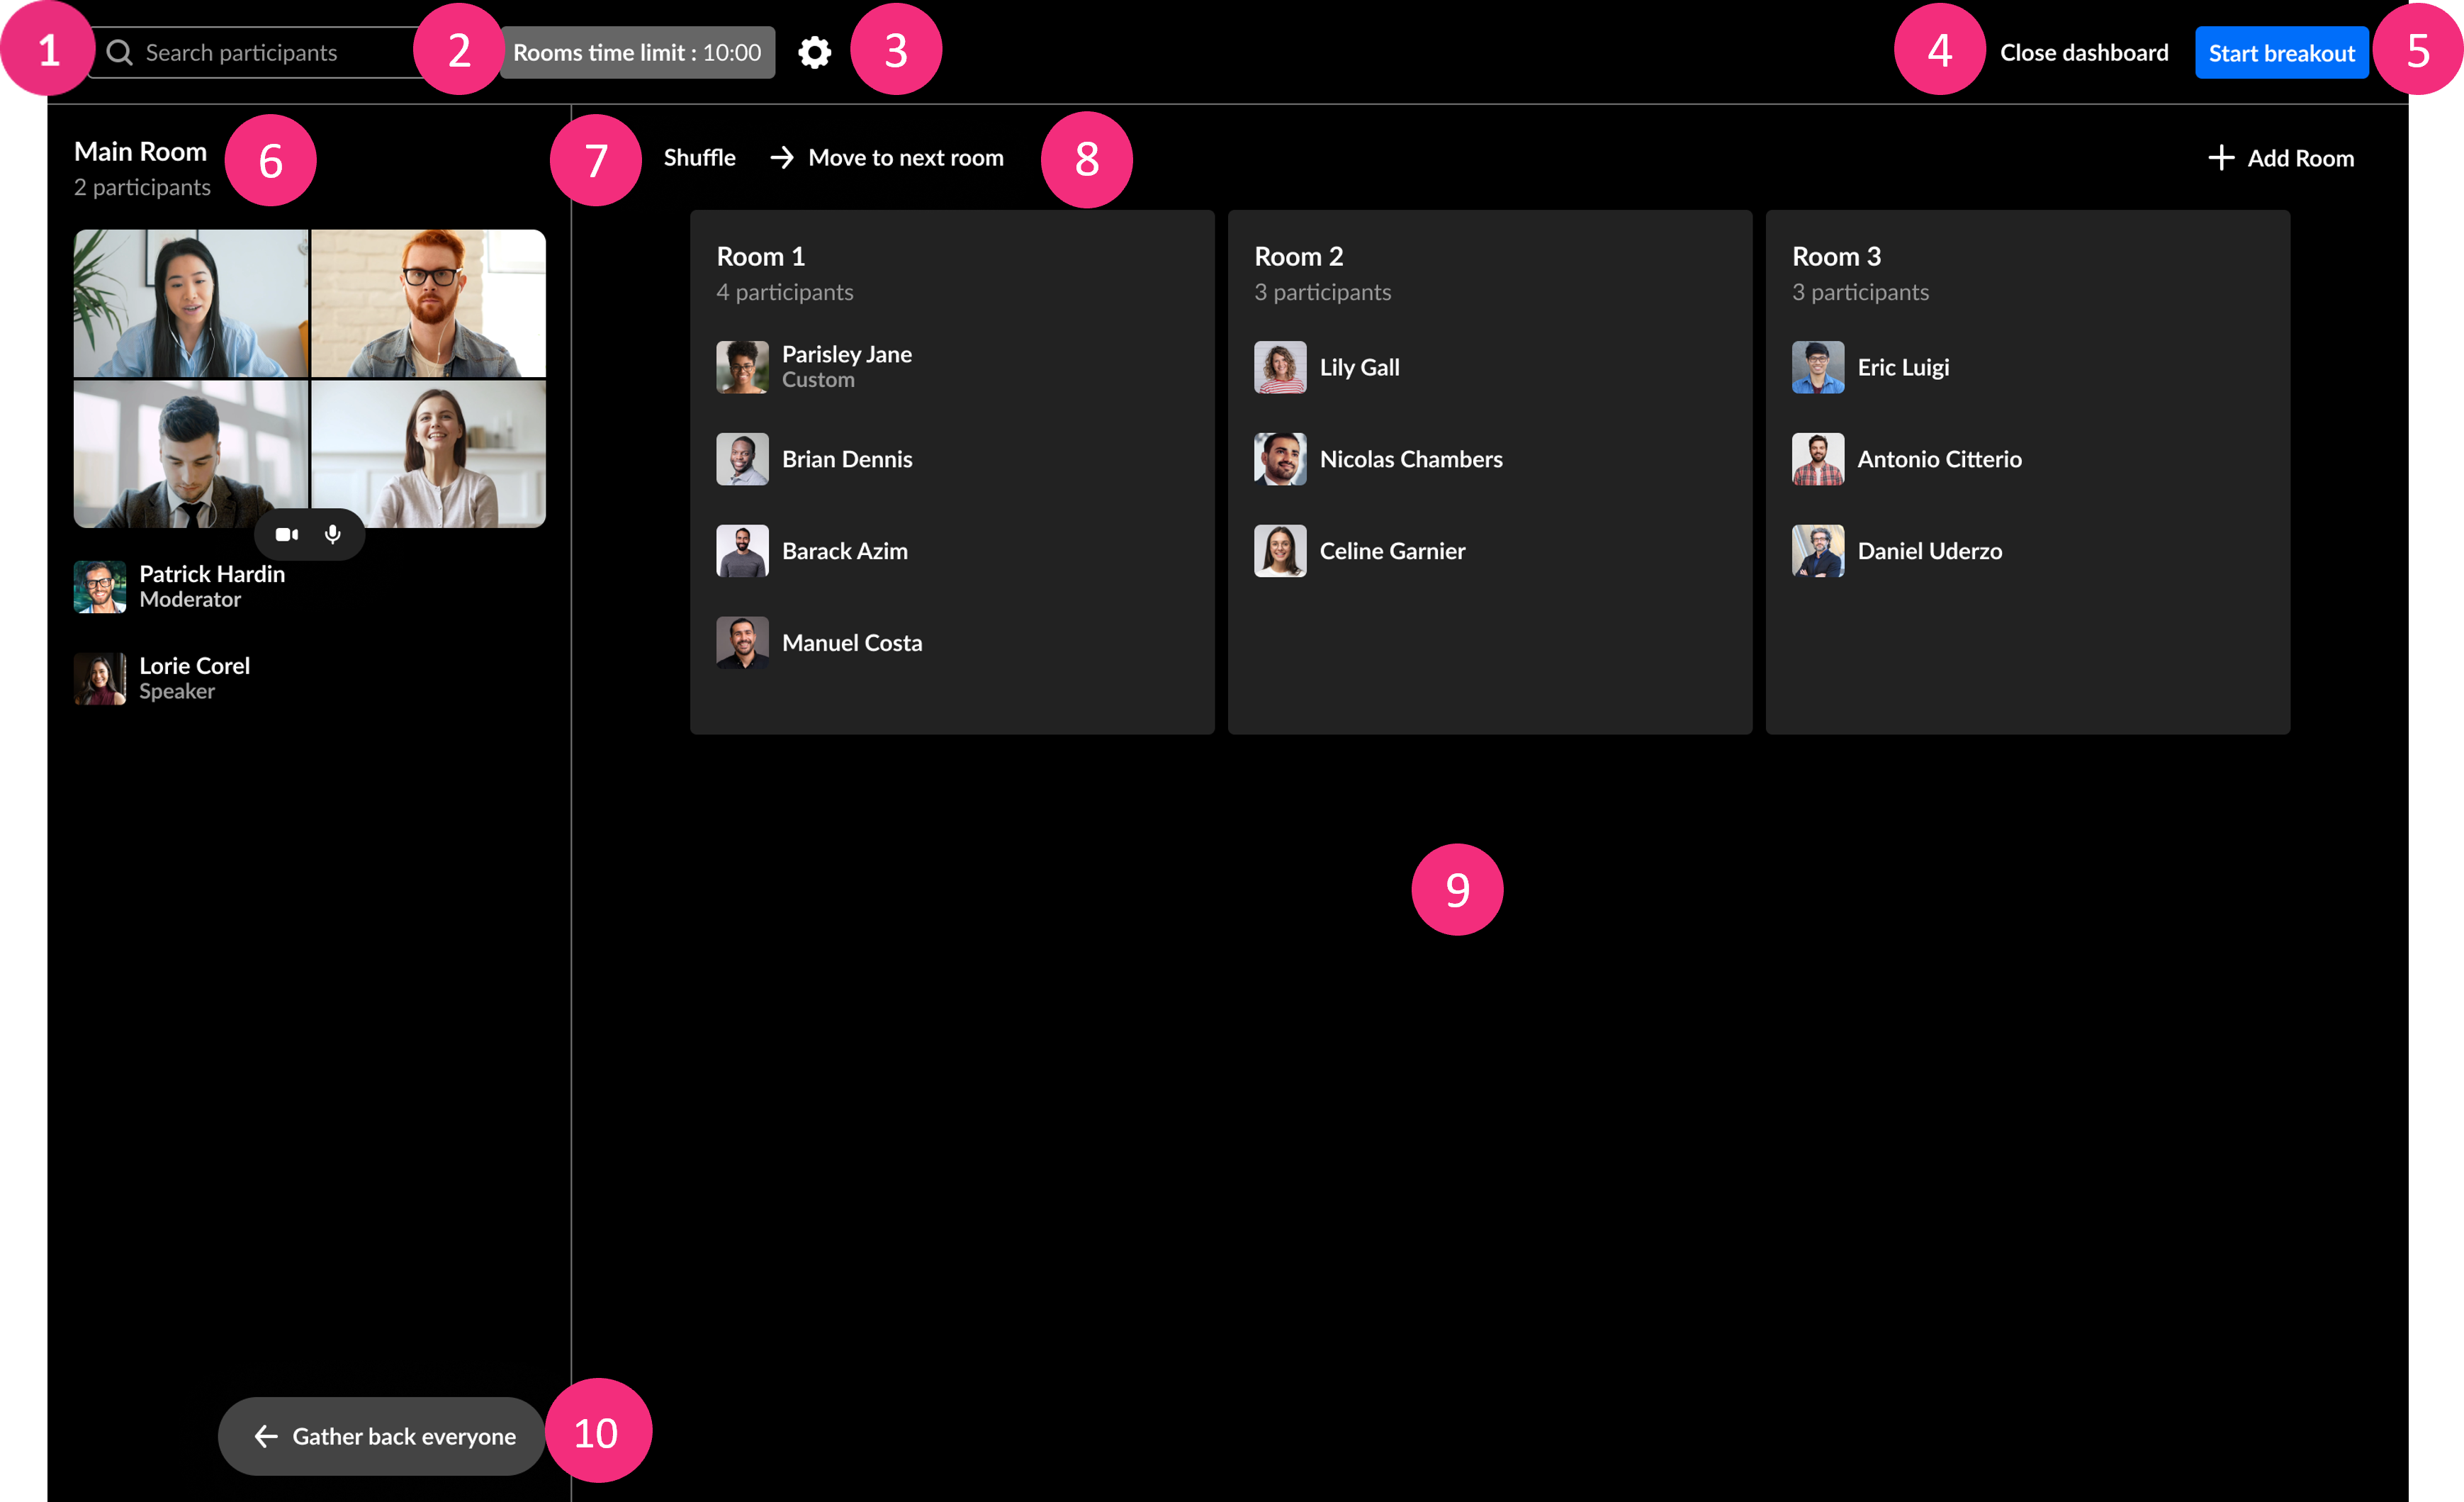
- Search participants — Typing two or more characters triggers a search for participants in relevant rooms. Rooms with matching participants will show up.
- Time limit — Time will display if set in the Start breakout rooms window. You can click on the text to adjust the time limit.
- Settings menu — When clicked, displays a drop-down menu with options to enable / disable a time limit, as well as set permissions for all participants regarding the breakout rooms.
- Close dashboard — Click to exit the window.
- Start breakout — Click to launch the session and start the timer.
- Main room panel — Displays the count and names of participants in the main room, along with the stage view. Hosts are automatically included in the main room list.
- Shuffle — Randomly re-assigns participants to different rooms.
- Move to next room — This activates a “Round Robin” switch, moving participants sequentially from one room to the next. This is useful, for example, when hosts want to distribute topics among rooms with participants covering all topics.
- Breakout rooms panel — This displays the names and number of the participants in each room*, as well as an + Add Room button on the top right to add more rooms.
- NOTE: The list of participants in each room is initially based on how you set them up in the Start breakout rooms window. However, you can also reassign participants by dragging their names, individually or by multi-selection, into different rooms.
- You can also change the room’s name or delete a room by hovering over a breakout room, and clicking the three- dots menu. A drop-down menu gives options to rename or delete a room.
- Assign Automatically or Gather back everyone - The button changes based on where participants are: In the main room, it displays “Assign Automatically” to send them to breakout rooms. In breakout rooms, it shows “Gather back everyone” to return them to the main room.
Once the breakout rooms’ session starts, a management banner is displayed on top of the host’s screen. The banner’s options allow easy access to all the main breakout room manager’s functions.
Top control bar

- Broadcast — This allows for announcements to be broadcasted from the main room to all breakout rooms. When you click the blue Broadcast button, you can choose to type your message and send it out. You can also broadcast from the dashboard.
- Remaining Time — This shows the time remaining to the current breakout rooms’ session, if a timer was set. You can click on ‘Remaining time’ to adjust the amount of time left. You can also adjust the remaining time in the dashboard.
- Room selection — This will display the name of the room you are in currently. You can move around rooms by clicking the name of the room on the banner, which will a display pop-up window to select a room to join.
- Alert bell — Participants in their breakout rooms can call a moderator, which will send the moderator a notification with a button to join the room, and will also display a bell icon, indicating to Open dashboard (as shown in the image below).The notification will disappear after a few minutes, but you can still click the bell icon to open the dashboard and see who called.
- Open dashboard — Click to manage the rooms with the features of the dashboard window.
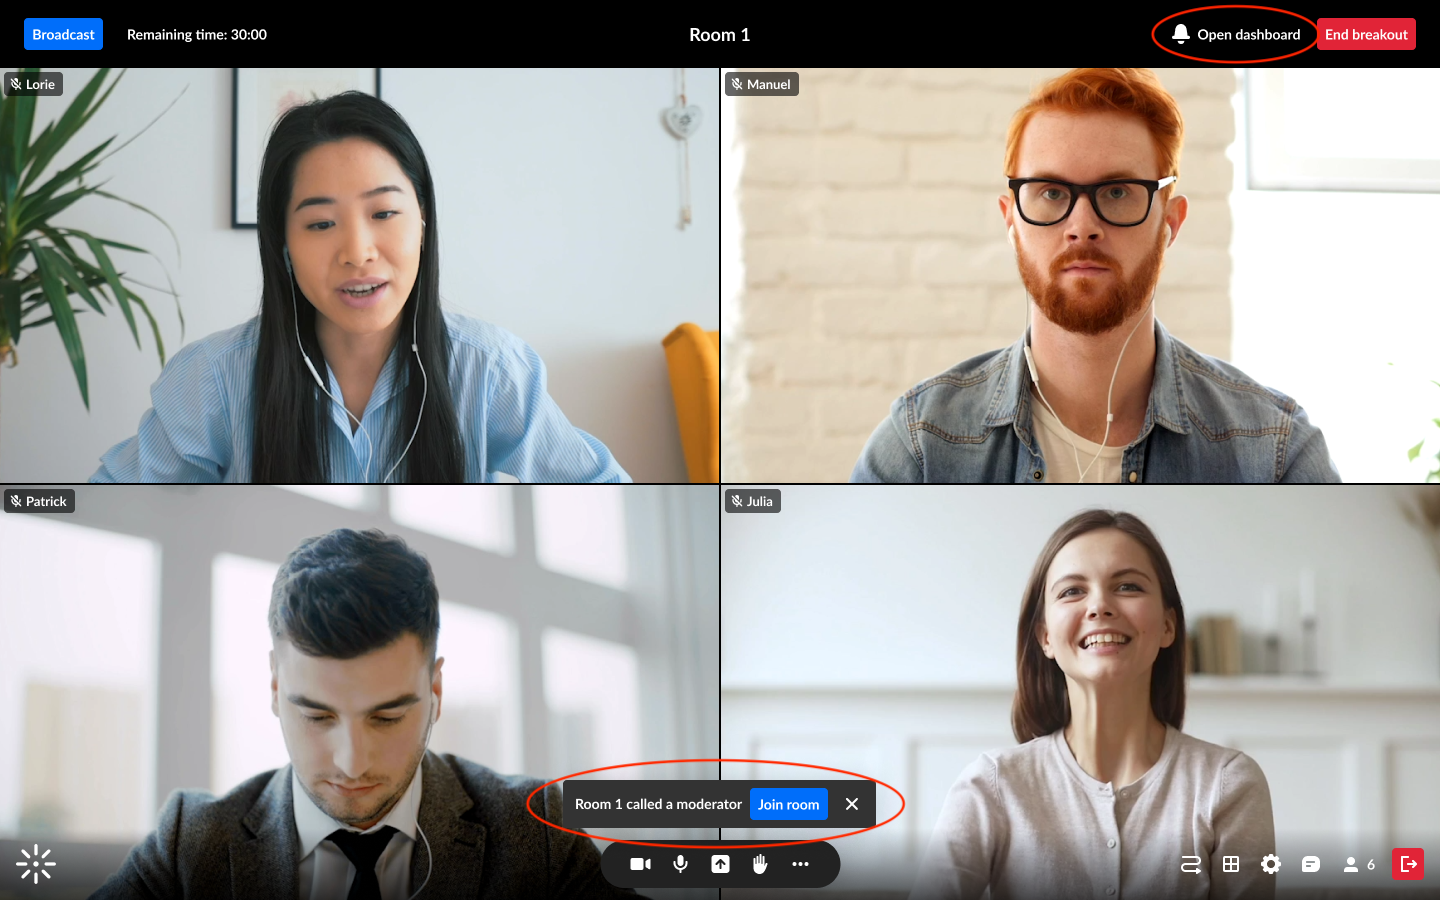
- End breakout — Click to send a countdown to participants until the breakout rooms end and all are returned to the main room. You will also be asked if you’d like to keep the rooms with all their settings for the next time.
Dashboard
While the breakout rooms are in session, the dashboard user interface displays the following:
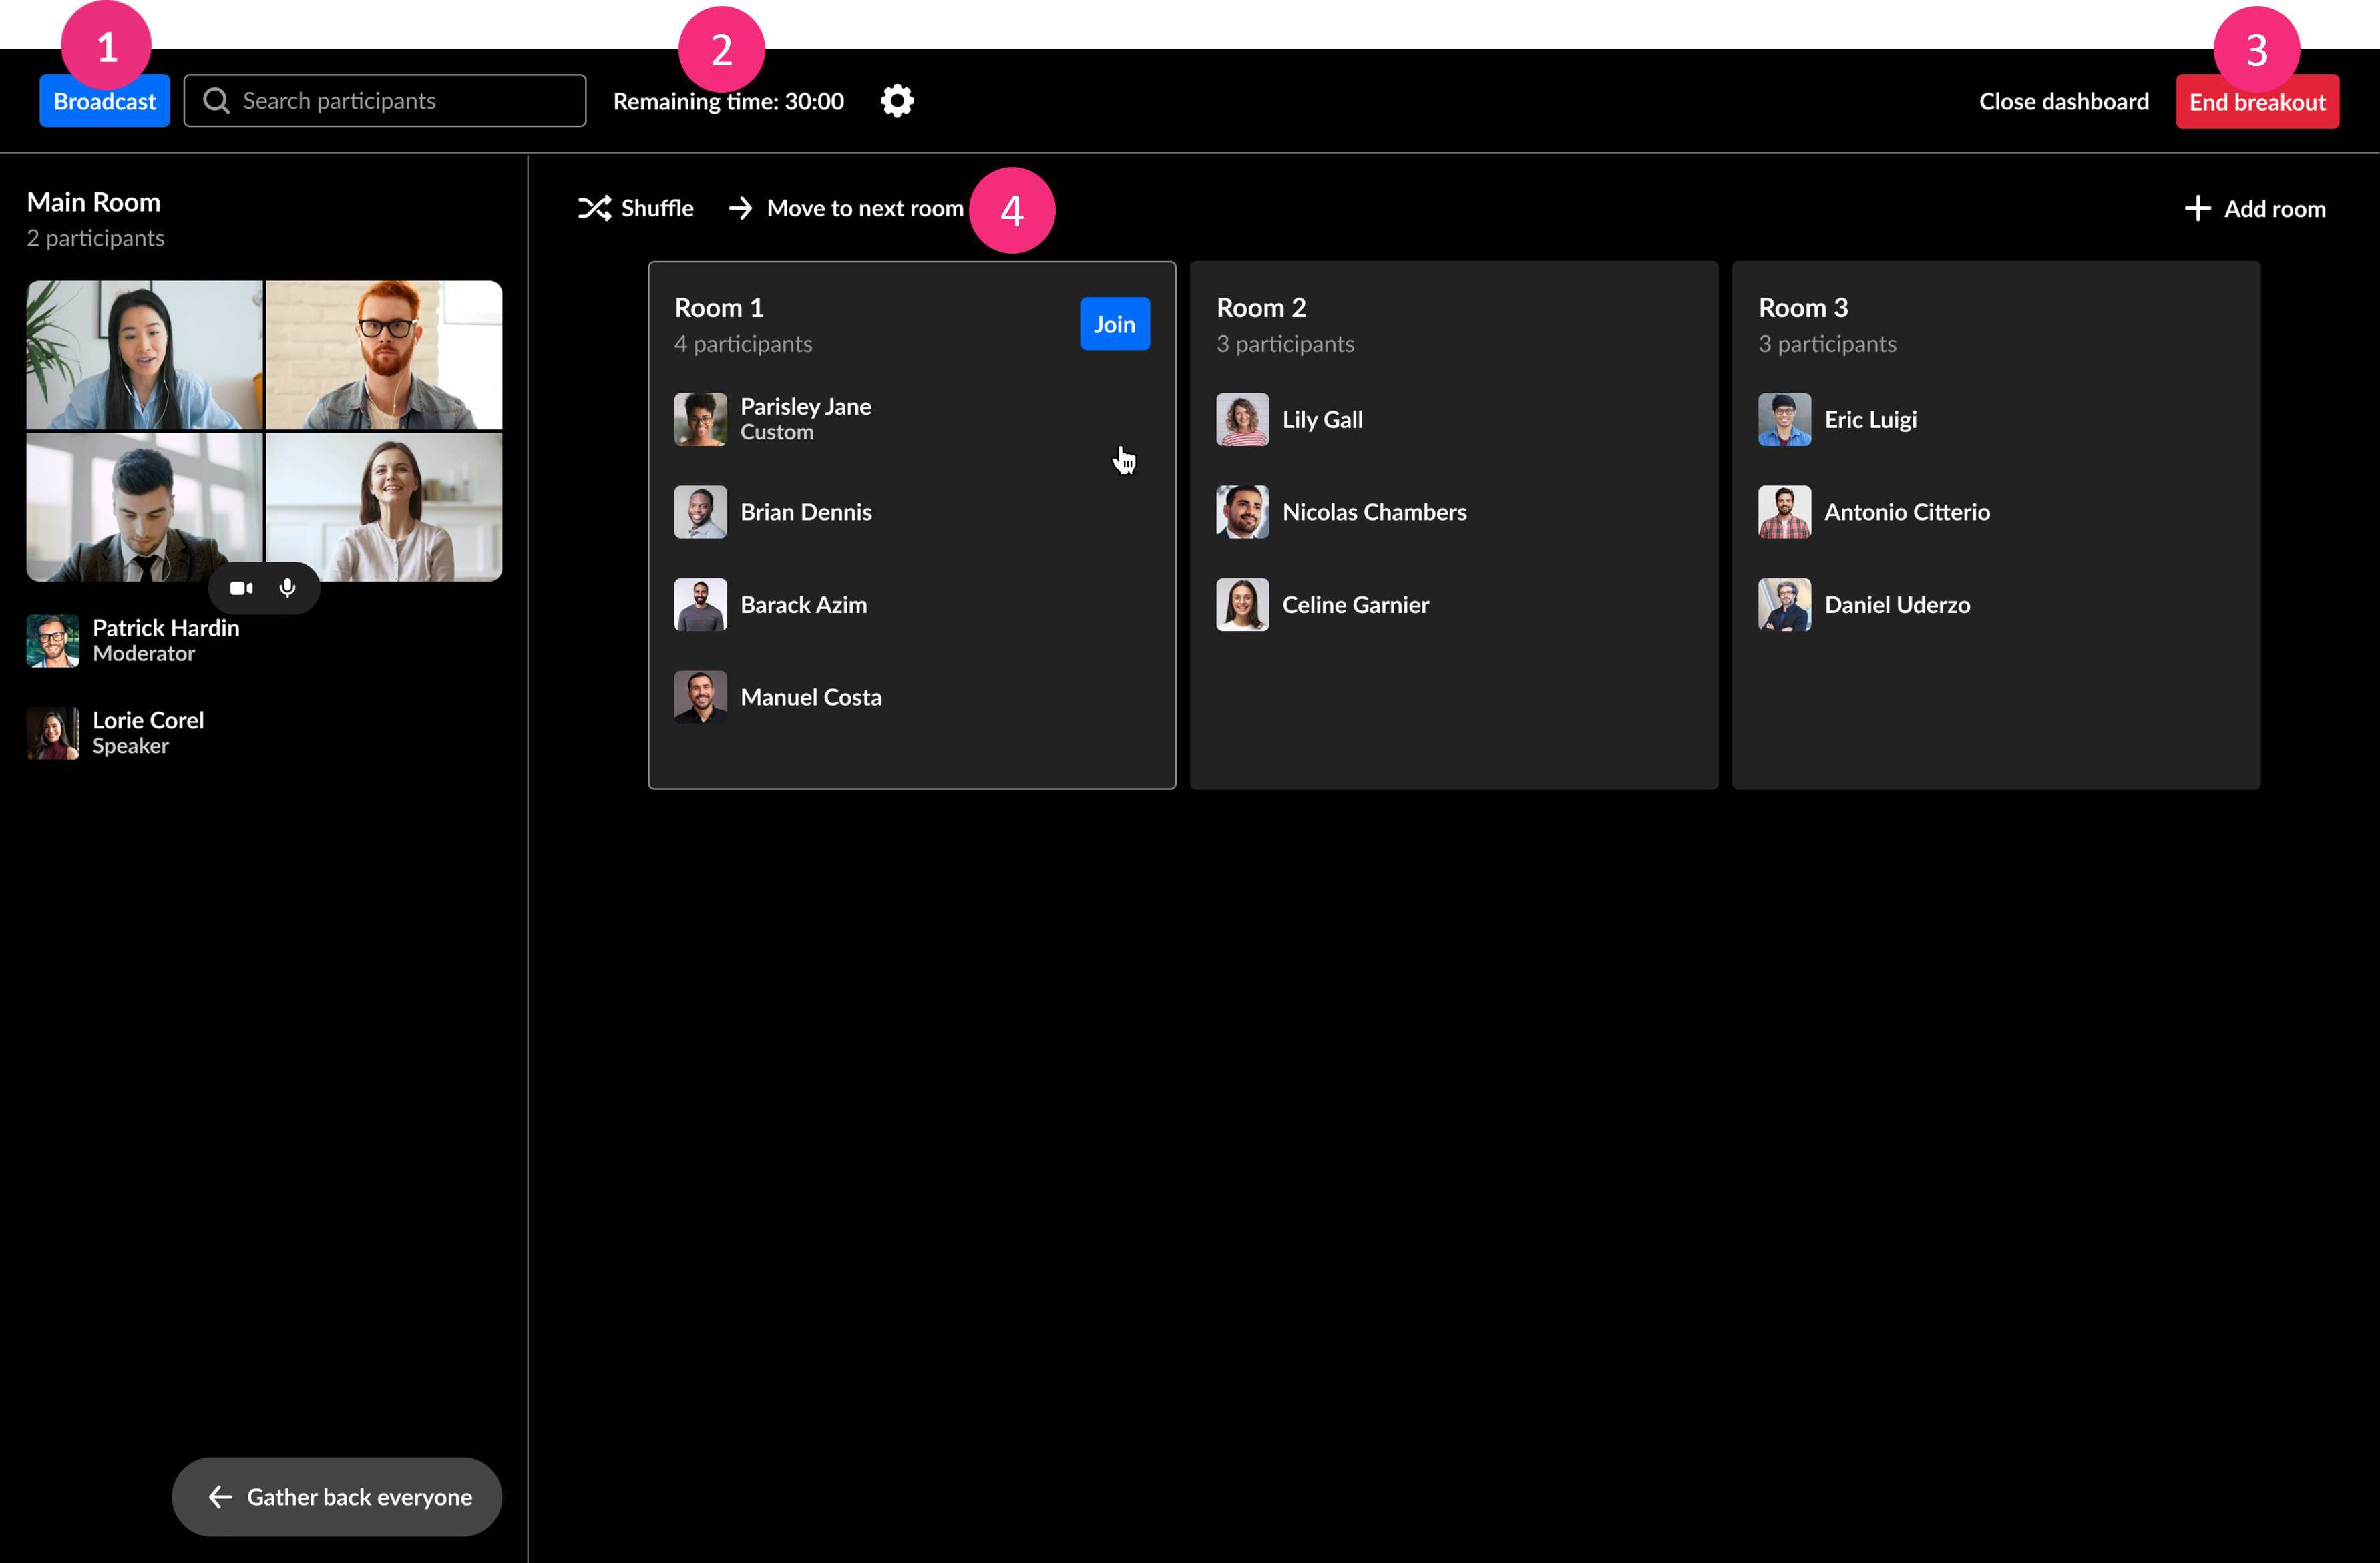
- Broadcast — Click the blue Broadcast button to send a broadcast out to all the rooms
- Remaining time — Click on ‘Remaining time’ to display a drop-down menu to adjust the remaining time in the breakout rooms.
- End breakout — Here you can end the breakout rooms, like you can in the banner.
- Switch rooms — Drag yourself or other participants to different rooms. Upon moving participants to another room, they will see a countdown and then will be moved to their new assignment. Upon moving yourself to another room, you will see your newly assigned room when you close the dashboard.
- Respond to calls — Participants who called a moderator will be highlighted in blue in their rooms on the dashboard. You can click the X on the blue highlighted row to dismiss the notification there, and then you can join the room to respond to the call.
For more detailed information visit the Breakout Sessions webpage on the Kaltura Knowledge Center site.
Record a Session
When recording sessions in Kaltura Room, it’s important to understand how recordings are captured, stored, and accessed. Below is an overview of key points, including recording quality, auto-upload behavior, and where recordings are saved.
Where are Recordings Saved?
- Recordings are saved as .mp4 files at 1080p
- Completed recordings are automatically added to the Recordings folder in your room’s Media and Files storage, which can be accessed from the three dots menu on the toolbar. Each recording file is named by default with the following convention: Rec — date and timestamp — meeting title.

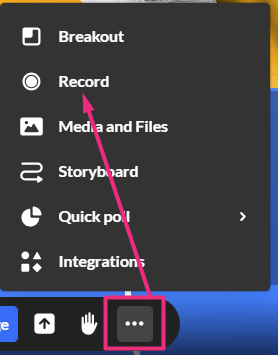
Start Recording
- Click the three dots menu.
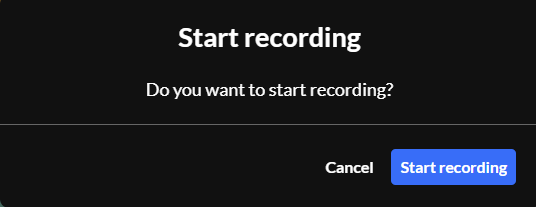
- Click Record. A confirmation message displays: Do you want to start recording?
- Click Start Recording (or Cancel).
Recording may take a minute to initialize. A notification displays on everyone’s screens: Recording will start momentarily, please wait. Then a notification displays for everyone: This session is being recorded.


While recording, all participants will see the recording indicator on the bottom left of their screen. Hosts and moderators will also see a counter and a square icon for stopping the recording.
End a Recording
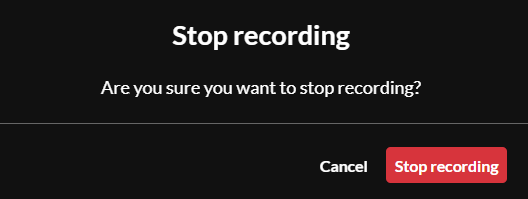
- Click the square on the bottom left of the screen OR click on the three dots menu and click Stop recording. A confirmation message displays.
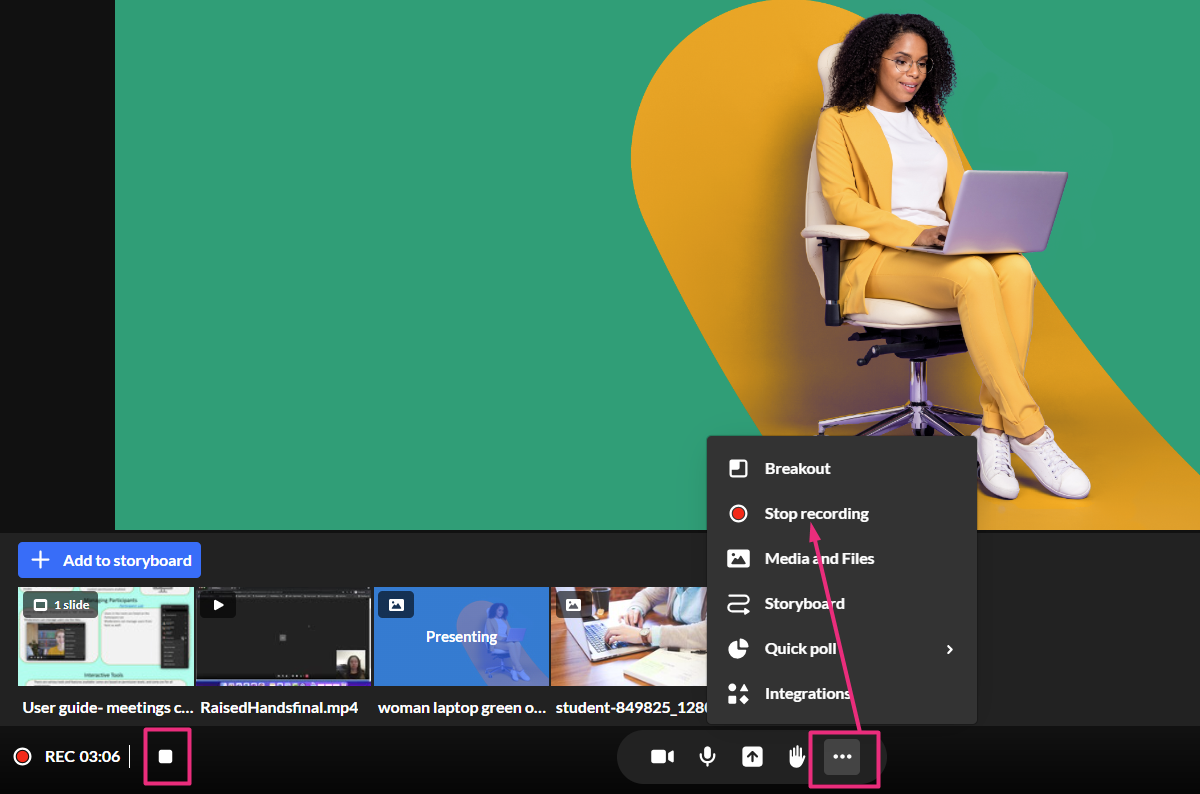
- Click the red Stop recording button.
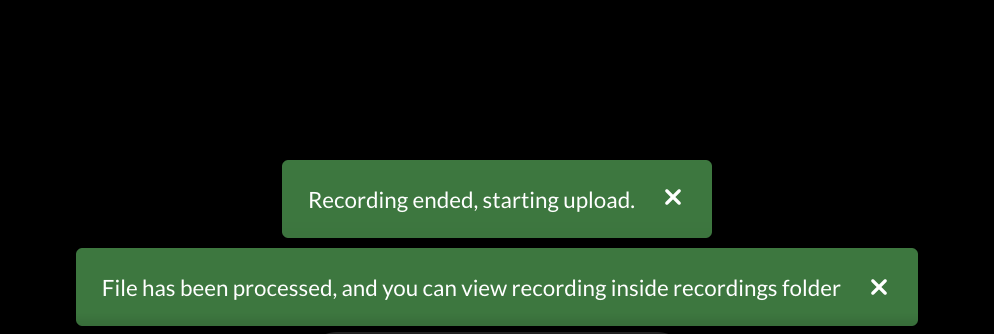
A notification displays Recording ended, starting upload. (Participants will see a notification that the “recording has completed.”) After a minute or two, a notification displays that your recording file is available.
For more detailed information visit the Record your session in Kaltura Room webpage on the Kaltura Knowledge Center site or view this PDF.
Recording Guidelines for NIC Instructors
These guidelines help instructors use web conferencing platforms, like Kaltura Virtual Classroom, responsibly when recording classes. The goal is to ensure students understand why recordings are made, how they are used, and how long they will be available.
Key points:
- Recordings are legally justifiable under Human Rights legislation and the duty to accommodate but should be done transparently and respectfully.
- Instructors must inform students, via course outline, Brightspace, or at the start of class, about:
- The reasons for recording (See Section A)
- How recordings are stored, accessed, and deleted (See Section B)
- Expected respectful conduct regarding recordings (See Section C)
- Students should be reminded at the start of each class and given a chance to ask questions. (See Section C)
- Additional guidance includes tips for managing recordings and a student-friendly version for course materials. (See Sections C and D)
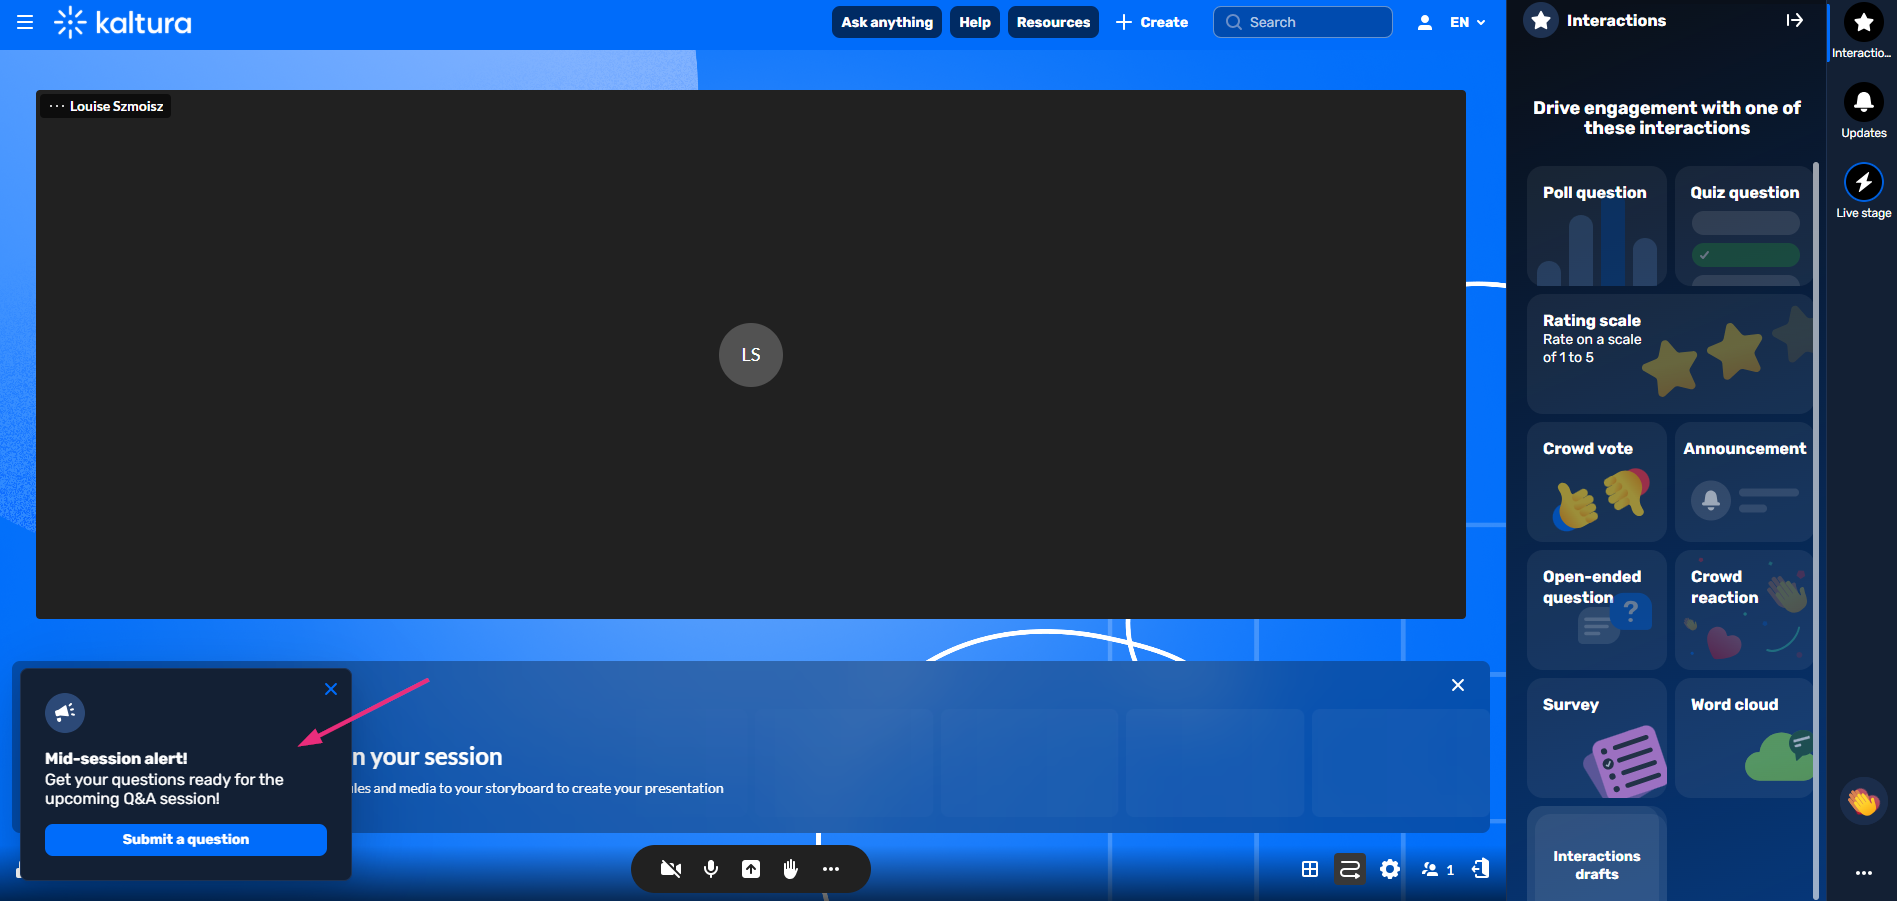
Drive Engagement with Kaltura Room Tools & Interactions
From the Interactions tab in the Chat and collaboration widget, you can create polls, quizzes, rating scales, surveys, word clouds, announcements, and more — all designed to keep students engaged and participating in real time. Once created, interactions can be published (made visible to students) right away, saved as drafts, or scheduled to appear at a later time.
NOTE: The Whiteboard is also a tool that drives engagement, but it is accessed from the Quick Share menu.
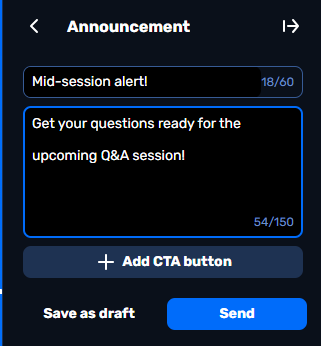
The Announcements interaction lets you share important updates or a Call to Action (CTA). To send an Announcement follow the steps below.
- Click Announcement to begin.
- (Optional) Enter a title for your announcement.
- Type your announcement text.
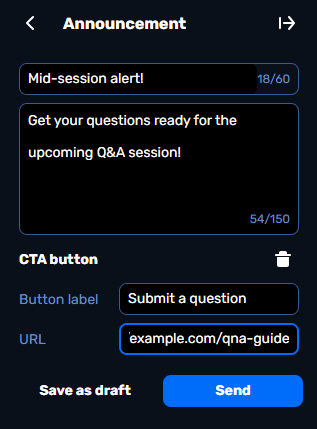
- (Optional) Click + Add CTA button to include a call-to-action button. Additional options display.
- Enter a label for your CTA button and the URL users will be directed to when they click it. To remove the CTA, click the trashcan icon.
- Decide whether to save as draft, publish now, or schedule.
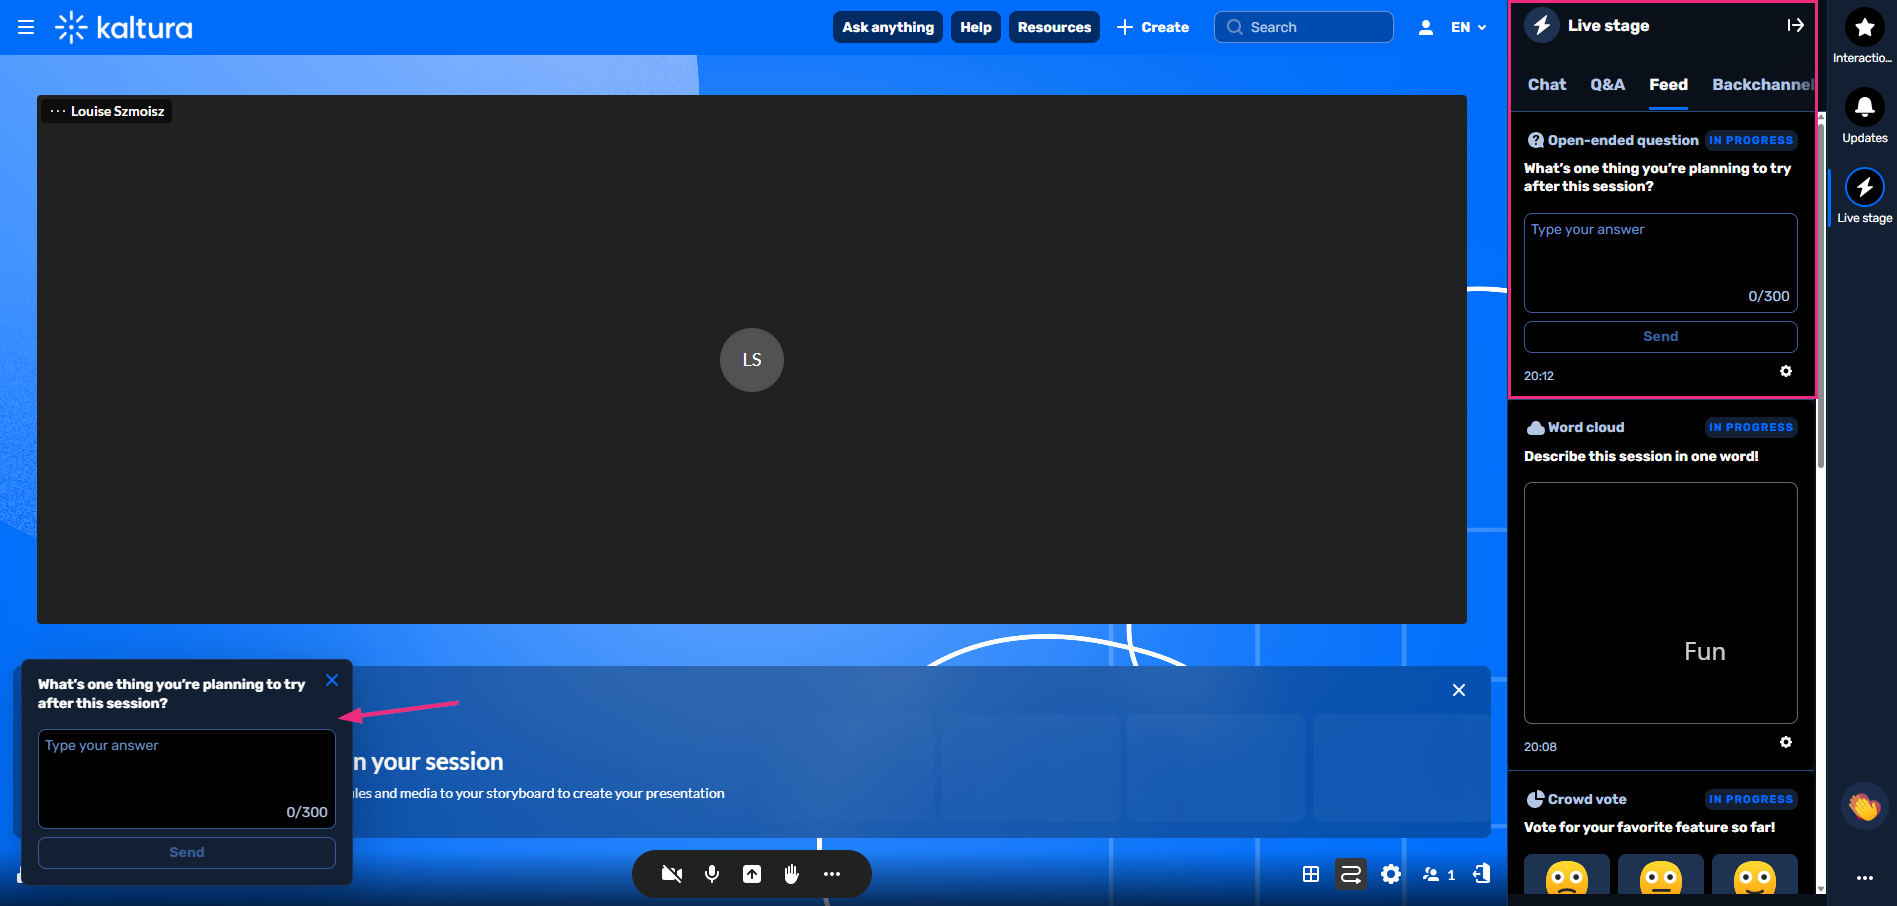
The Announcement pops up in the bottom left corner of the screen.
For more detailed information visit the Interaction tools for moderators in Kaltura Rooms webpage on the Kaltura Knowledge Center site or view this PDF.
Gather and send immediate feedback by deploying a Crowd Vote, a Crowd Reaction or a Rating Scale interaction.
Crowd Vote
Crowd Reaction
Rating Scale
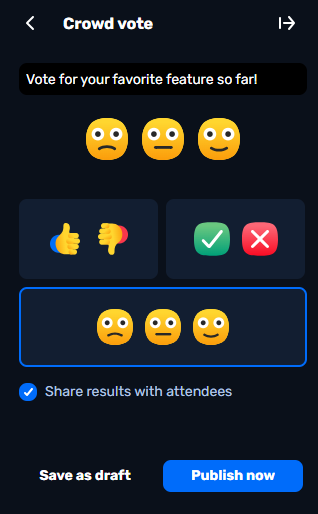
- Click Crowd vote to begin.
- Replace the default text with your question or statement.
- Choose your crowd vote emoji.
- Decide whether to share results with attendees.
- (Optional) Set a duration for how long the vote stays active.
- Decide whether to save as draft, publish now, or schedule.
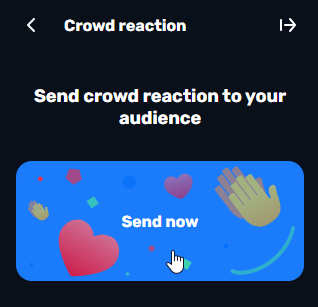
- Click Crowd reaction.
- Hover over the desired crowd reaction to highlight it, and a Send now button will appear.
- Click to send the crowd reaction.
Instructor-activated crowd reactions complement student reactions by highlighting key moments in Live Sessions and boosting overall engagement.
For example, timed confetti can be scheduled in advance or triggered manually during the event. It displays across the entire screen, adding excitement and marking special moments for students.
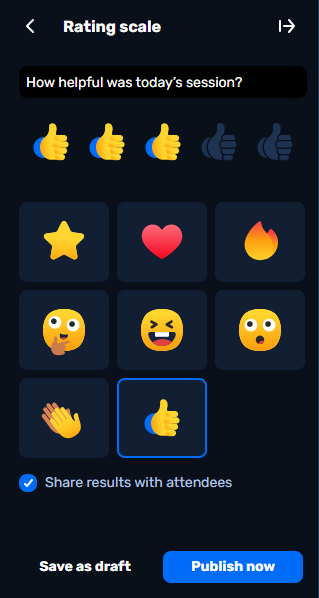
- Click Rating scale.
- Replace the default text with your question or statement.
- Choose your rating scale emoji.
- Decide whether to share results with attendees.
- (Optional) Set a duration for how long the rating stays active.
- Decide whether to save as draft, publish now, or schedule.
For more detailed information visit the Interaction tools for moderators in Kaltura Rooms webpage on the Kaltura Knowledge Center site or view this PDF.
Use Open-ended Questions or Word Cloud to expand thinking and draw out key insights.
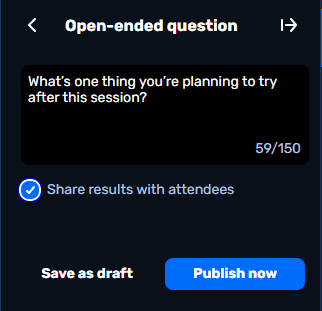
Open-ended Question
- Click Open-ended question to begin.
- Type your question in the text field.
- Decide whether to share results with attendees.
- (Optional) Set a duration for how long the word cloud stays active.
- Decide whether to save as draft, publish now, or schedule.
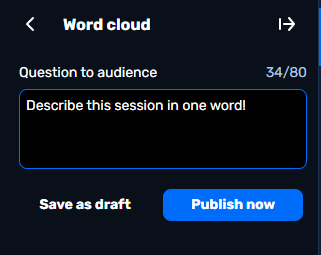
Word Cloud
- Click Word cloud.
- Type your question in the Question to audience field (up to 80 char).
- (Optional) Set a duration for how long the word cloud stays active.
- Decide whether to save as draft, publish now, or schedule.
- Once results are in, they are displayed to all in the Feed sub-tab of the Live stage tab.

The interaction pops up in the bottom left corner of the screen and in the Feed.
For more detailed information visit the Interaction tools for moderators in Kaltura Rooms webpage on the Kaltura Knowledge Center site or view this PDF.
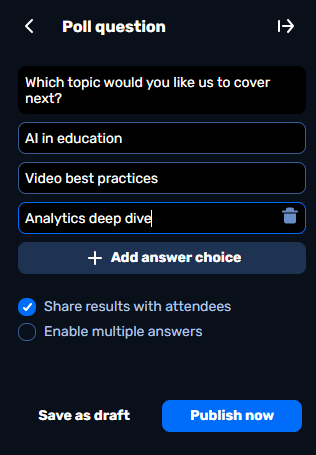
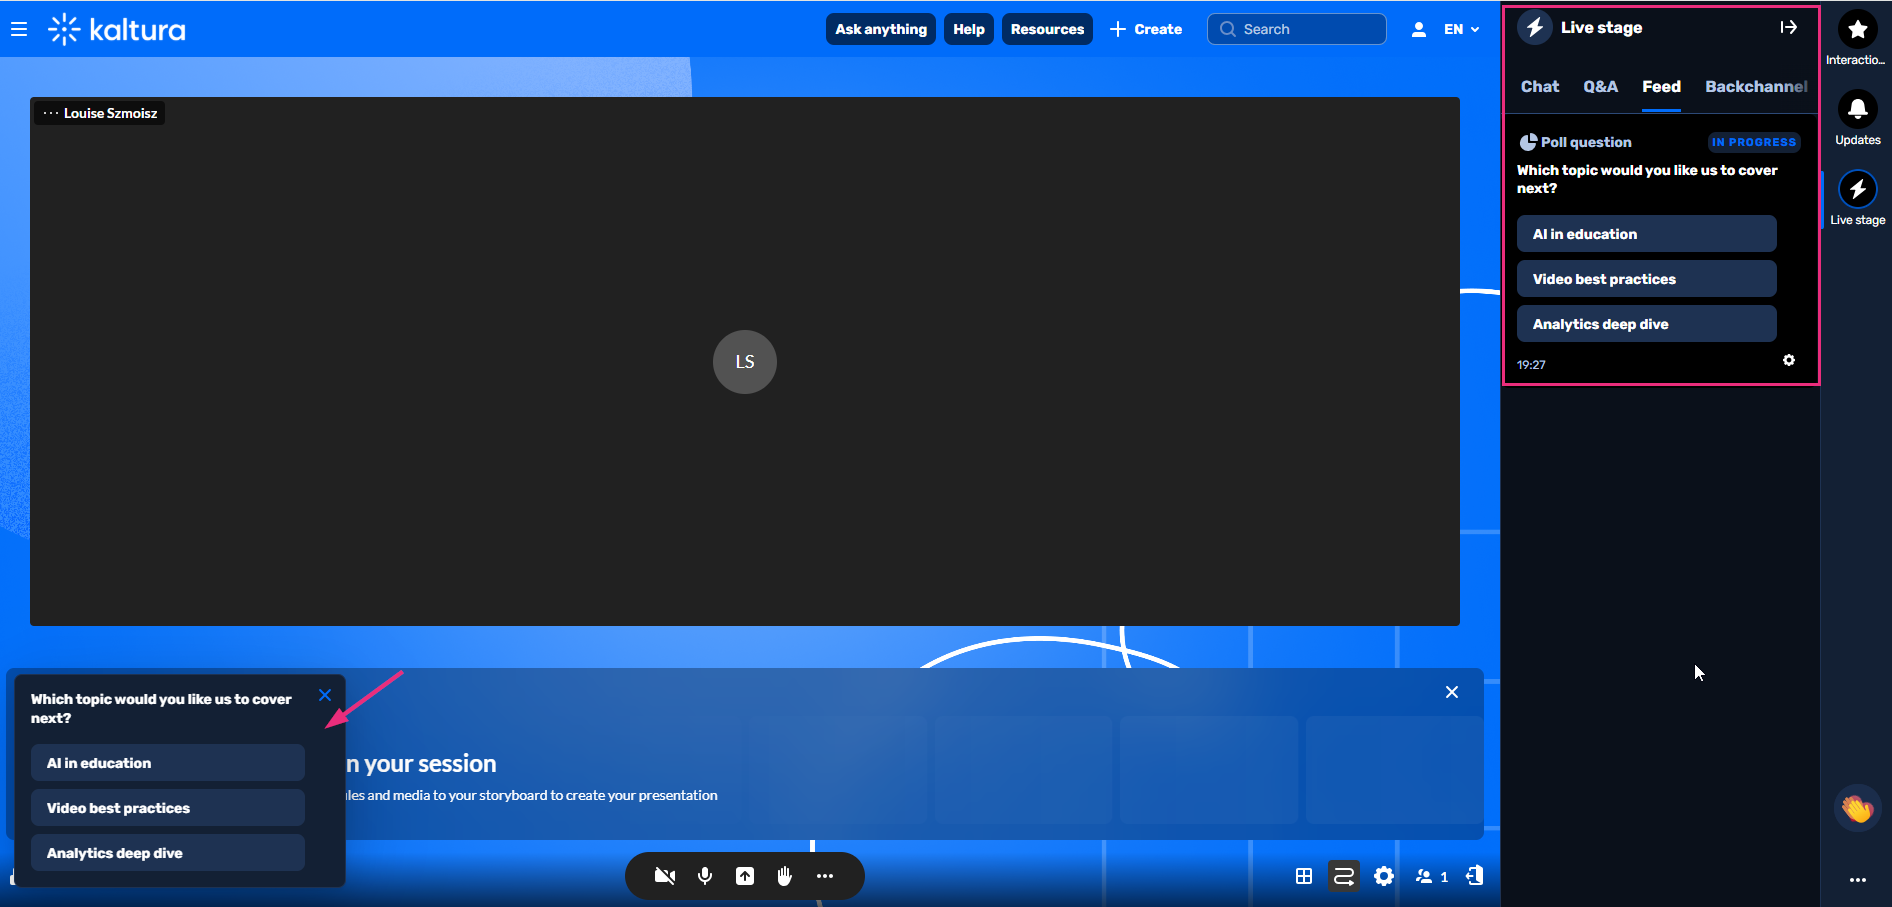
Polls
- Click Poll question.
- Type your question (up to 300 chars).
- Enter up to five answer options. Click + Add answer choice to add more options. (To remove an answer, hover over it and click the trashcan icon.)
- Choose whether to share results with attendees or enable multiple answers.
- (Optional) Set a duration for how long the poll stays active.
- Decide whether to save as draft, publish now, or schedule.
The interaction pops up in the bottom left corner of the screen and in the Feed.
Quizzes
- Click Quiz question.
- Type your question (up to 300 chars) and answers (up to five total).
- Click + Add answer to add more. (To remove an answer, hover over the answer and click the trashcan icon.)
(Optional) Allow multiple correct answers by clicking the check mark next to each correct option. At least one must be correct.
- Choose whether to display the correct answer or share results with attendees.
- (Optional) Set a duration for how long the quiz stays active.
- Decide whether to save as draft, publish now, or schedule.
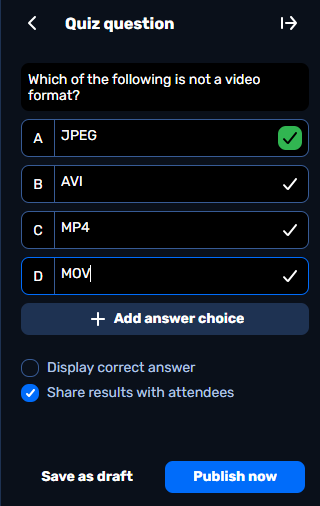

The interaction pops up in the bottom left corner of the screen and in the Feed.
Surveys
- Click Survey.
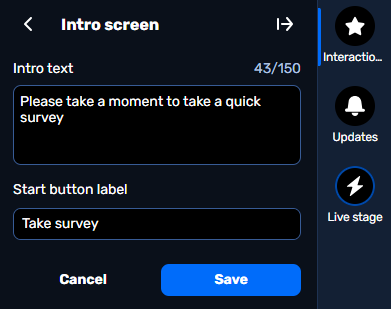
- The survey defaults to the session name (max 150 characters). To change it, hover over the name, click it, and type a custom title.
- To customize the introduction, hover over the default intro text (“Please take a moment to take a quick survey”) and click Edit.
- Type your intro text and a label for the survey start button, then click Save.
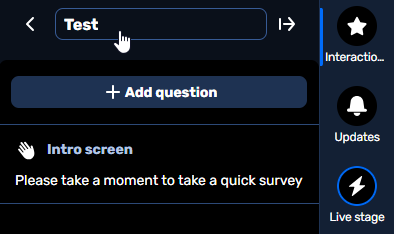
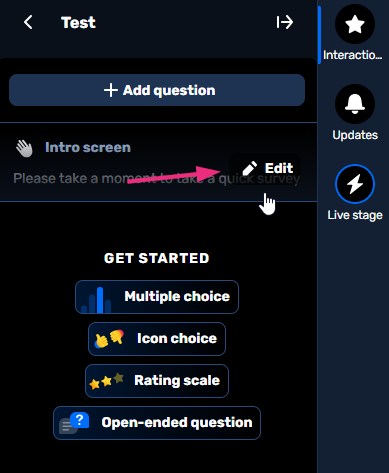
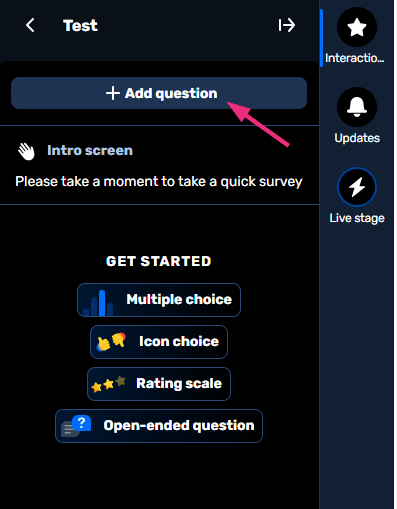
Add Questions
- Click + Add question to begin. You can add up to 10 questions.
- Choose the question type.
For more detailed information visit the Interaction tools for moderators in Kaltura Rooms webpage on the Kaltura Knowledge Center site or view this PDF.
Kaltura’s whiteboard is a versatile tool for meetings, lessons, and collaborative brainstorming. It’s designed for easy, real-time interaction and helps increase engagement through visual explanations and active participation.
Using the Whiteboard
Display the Whiteboard
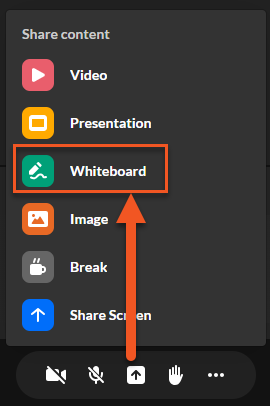
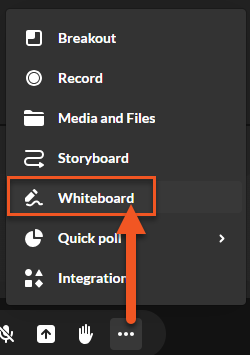
Click the Share Content icon or the three dots on the bottom toolbar and select Whiteboard. The whiteboard displays.
Whiteboard Tools
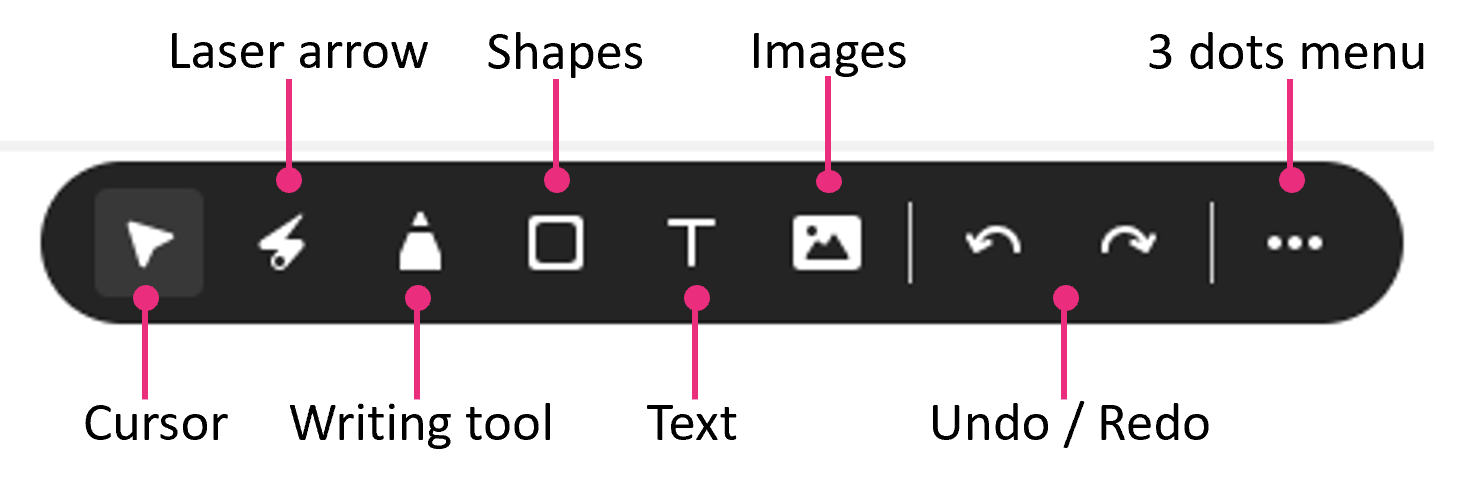
- Cursor: Use the cursor tool to select drawn objects then move them, resize them, or edit them.
- Laser Arrow: Use the laser arrow to enable your participants to track your cursor as it moves along the whiteboard. Each participant has their own laser pointer identified by their first name to help you identify who is using the laser pointer.
- Writing Tool: Use the pencil or highlight tool to annotate or highlight items on the whiteboard. You can choose the colour and thickness.
- Shapes: Choose a square, triangle, circle or line from the menu, make it solid or outline, and click and drag your cursor to draw the shape. You also have the option to change the colour of the marks you draw.
- Text: Click where you want your text, type your text and click outside the box to post it. Edit by double-clicking the text box. You can create clickable links by typing or pasting a web address.
- Images: You can upload to the Media Gallery or select previously uploaded images by clicking the images icon.
- Undo/Redo: Click the undo / redo arrows to undo or redo previous actions. Undo and Redo apply to the current session only. You cannot undo or redo marks from previous sessions.
3 Dots Menu
- Clear Whiteboard: Click the 3 dots menu at the end of the toolbar. Select Clear whiteboard. The whiteboard clears immediately.
- Whiteboard View: Two backgrounds can be applied to the whiteboard: Line grid and Dot grid.
- Collaborate: Click the three dots menu at the end of the toolbar. Toggle on Allow participants to collaborate.
Zoom, Delete and Dismiss
- Zoom: The zoom in / out control is at the bottom right of the screen. Click + to zoom in and - to zoom out.
- Delete: Instructors / moderators can delete any marks drawn on the whiteboard by using the cursor tool to select the object you want to delete and clicking delete on your keyboard.
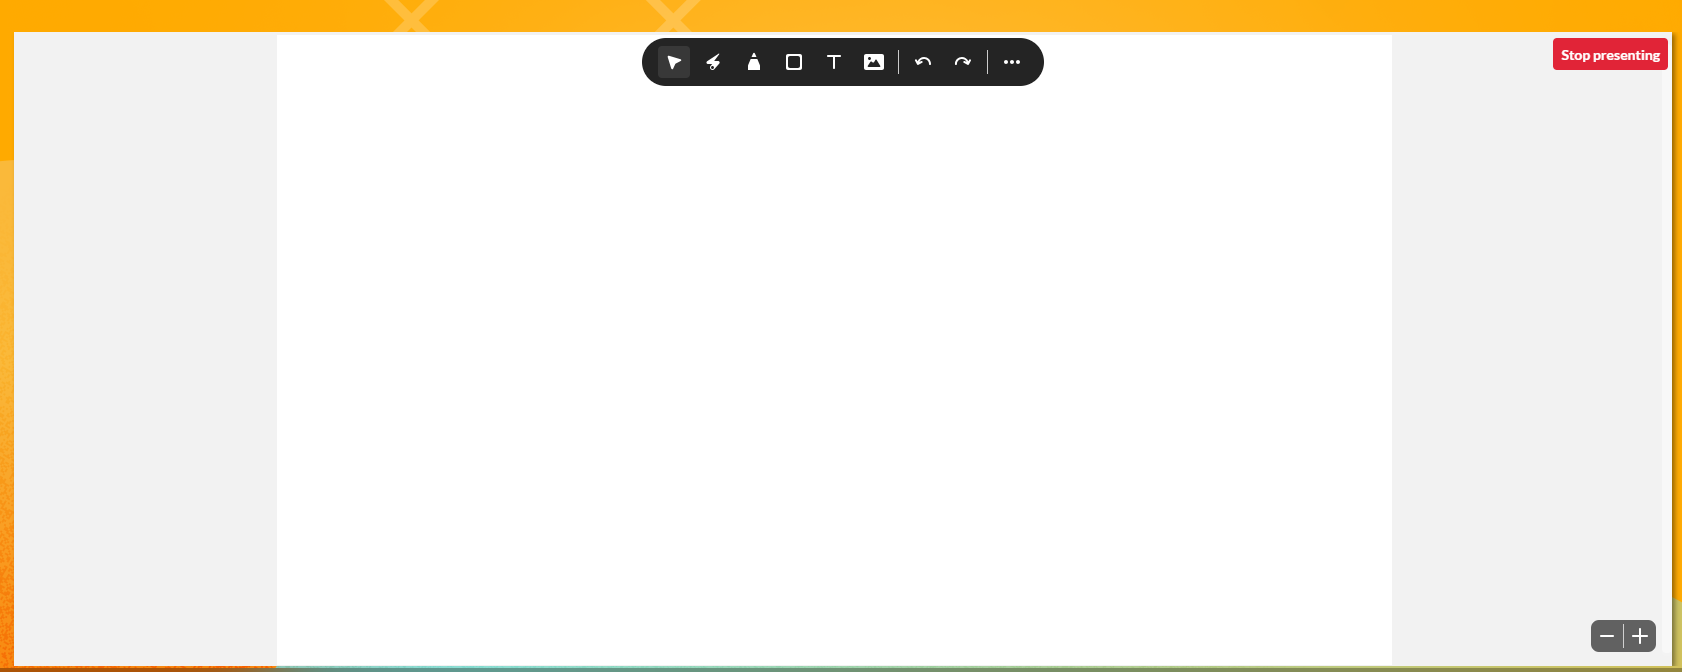
- Dismiss: To dismiss the whiteboard, click Stop presenting in the top right of the stage. Dismissing the whiteboard does not clear it. The whiteboard annotations are saved in the room until erased.
For more detailed information visit the Use Kaltura’s whiteboard in Kaltura Rooms webpage on the Kaltura Knowledge Center site or view this PDF.