
Make Course Active
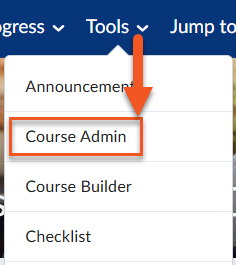
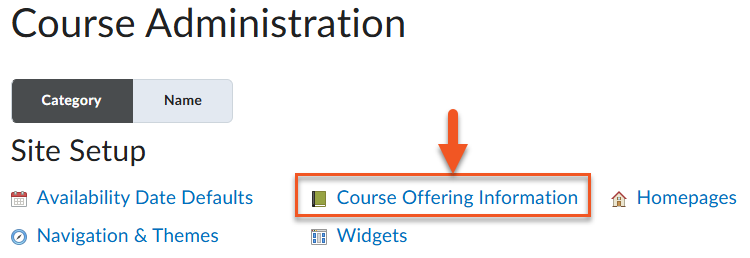
All Brightspace courses are set to Inactive by default, which means students can’t see them. You have up to 30 days prior to the official start of course to make your course Active by going to Tools > Course Admin > Course Offering Information and scrolling down the page to check the box off that says Course is Active. Once the checkbox has been checked, the course will be visible to students. You can confirm your course’s start and end dates here as well. Brightspace courses at NIC are set by default to open 30 days prior to their official start date and end 90 days after their official end date.

Is Your Course Ready Before Releasing it to Your Students?
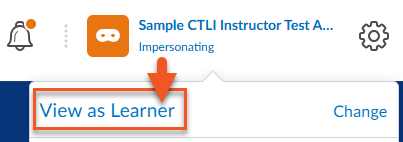
To View as Learner click on your name or profile image in the top right corner of the course homepage and select View as Learner.
Note: The View as Learner option in Brightspace provides a general preview of the student experience, but some features (such as release conditions, grade visibility, or activity access) may not display accurately. For a fully accurate student view, request that a test student account be added to your course by submitting a service desk ticket.
In Brightspace, you can control whether individual course items are visible or hidden to students. Even if your course is active, hidden items will not appear in the student view until you choose to make them visible. This allows you to drip content over time, releasing lessons, assignments, or materials according to a schedule or learning plan while keeping other parts of the course temporarily inaccessible. Wherever you see the eye icon, you have the opportunity to hide or make visible from users.