
Prep Your Room
Organize your content for smooth navigation and delivery by preparing it in Kaltura’s Storyboard (formerly Playlist). Use Scene Manager to build your layouts in advance, arranging content and webcams into different scenes and adding them directly to your Storyboard.
Media and Files brings all file types together in one place, making it easy to browse your library, upload new media, or import YouTube videos. You can also customize your classroom with background images and lower thirds (on-screen labels) to improve clarity and create a more polished learning experience.
The old Playlist tool in Kaltura Virtual Classroom has been replaced by the new Storyboard tool in Kaltura Room. The Storyboard is similar to the Playlist tool but offers enhanced functionality for organizing and sequencing media.
How to Use Storyboard (formerly Playlist)
Watch the 2:45 minute video below for an overview of Kaltura’s Storyboard tool. For more detailed information visit the Storyboard in Kaltura Rooms webpage on the Kaltura Knowledge Center site or view this PDF. NOTE: The following media types are supported: image, video, audio, PPT, PDF.
**Added Features**
- Interludes: Option to choose preset timers with audio and video to play as students enter the room before starting the class or during breaks.
- Custom Scenes: Allows you to choose how to organize your content and webcams for each piece of content shared.
- Slide Selection: Select specific slides in PowerPoint presentations to share, this allows you to break up content and weave in videos if needed.
Use Scene Manager to Create Custom Scenes
Watch the 1:33 minute video below to learn how to customize scenes that can be added to your Storyboard.
For more detailed information visit the Scene manager in Kaltura Rooms webpage on the Kaltura Knowledge Center site or view this PDF.
Media Manager
Using Kaltura Room’s Media Manager streamlines adding and managing media for a seamless session experience. It consolidates all file types in one place, allowing you to browse, upload media, and import YouTube videos with ease.
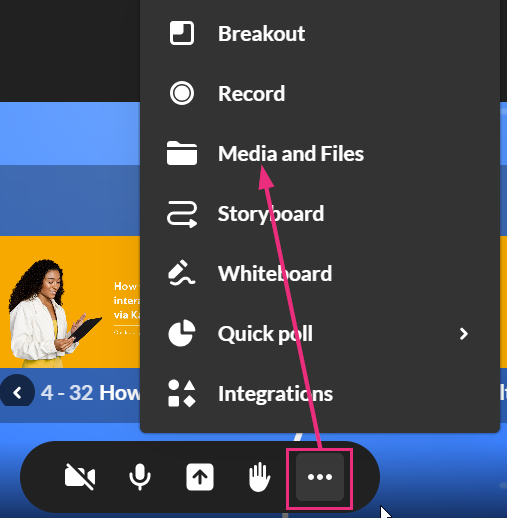
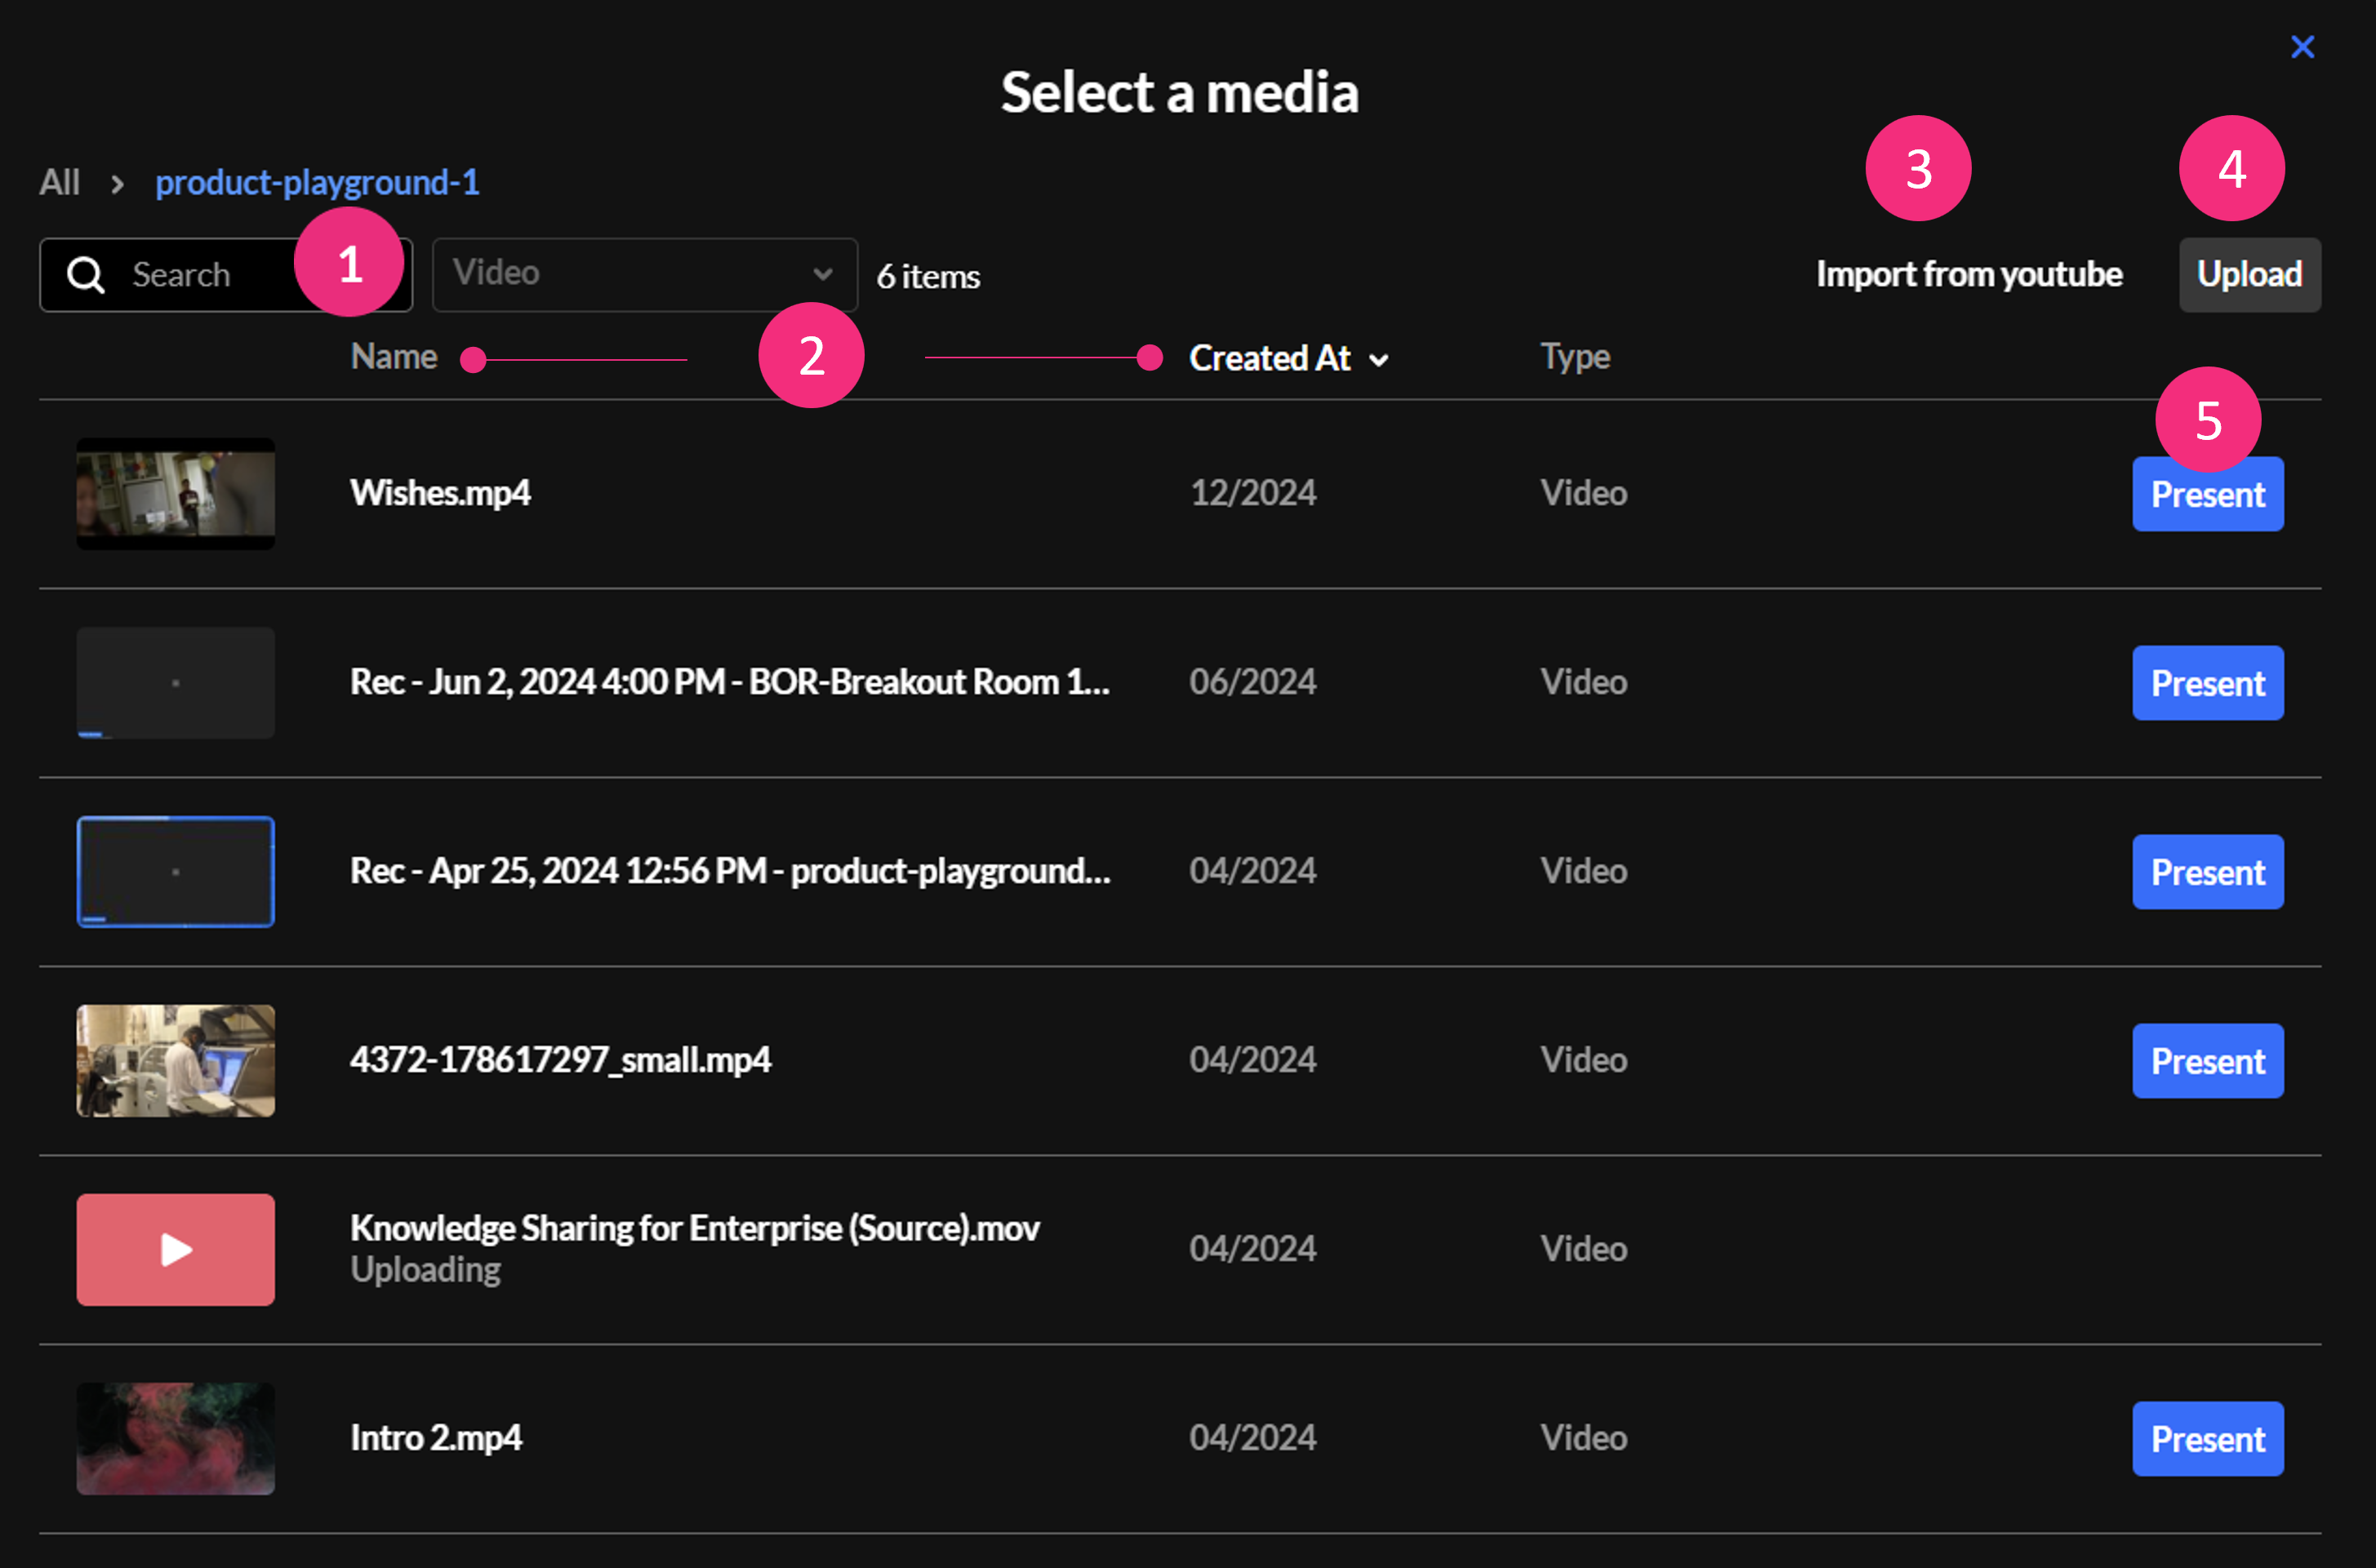
Access Media Manager by clicking the three-dot menu and selecting Media and Files. The Select a media window opens.
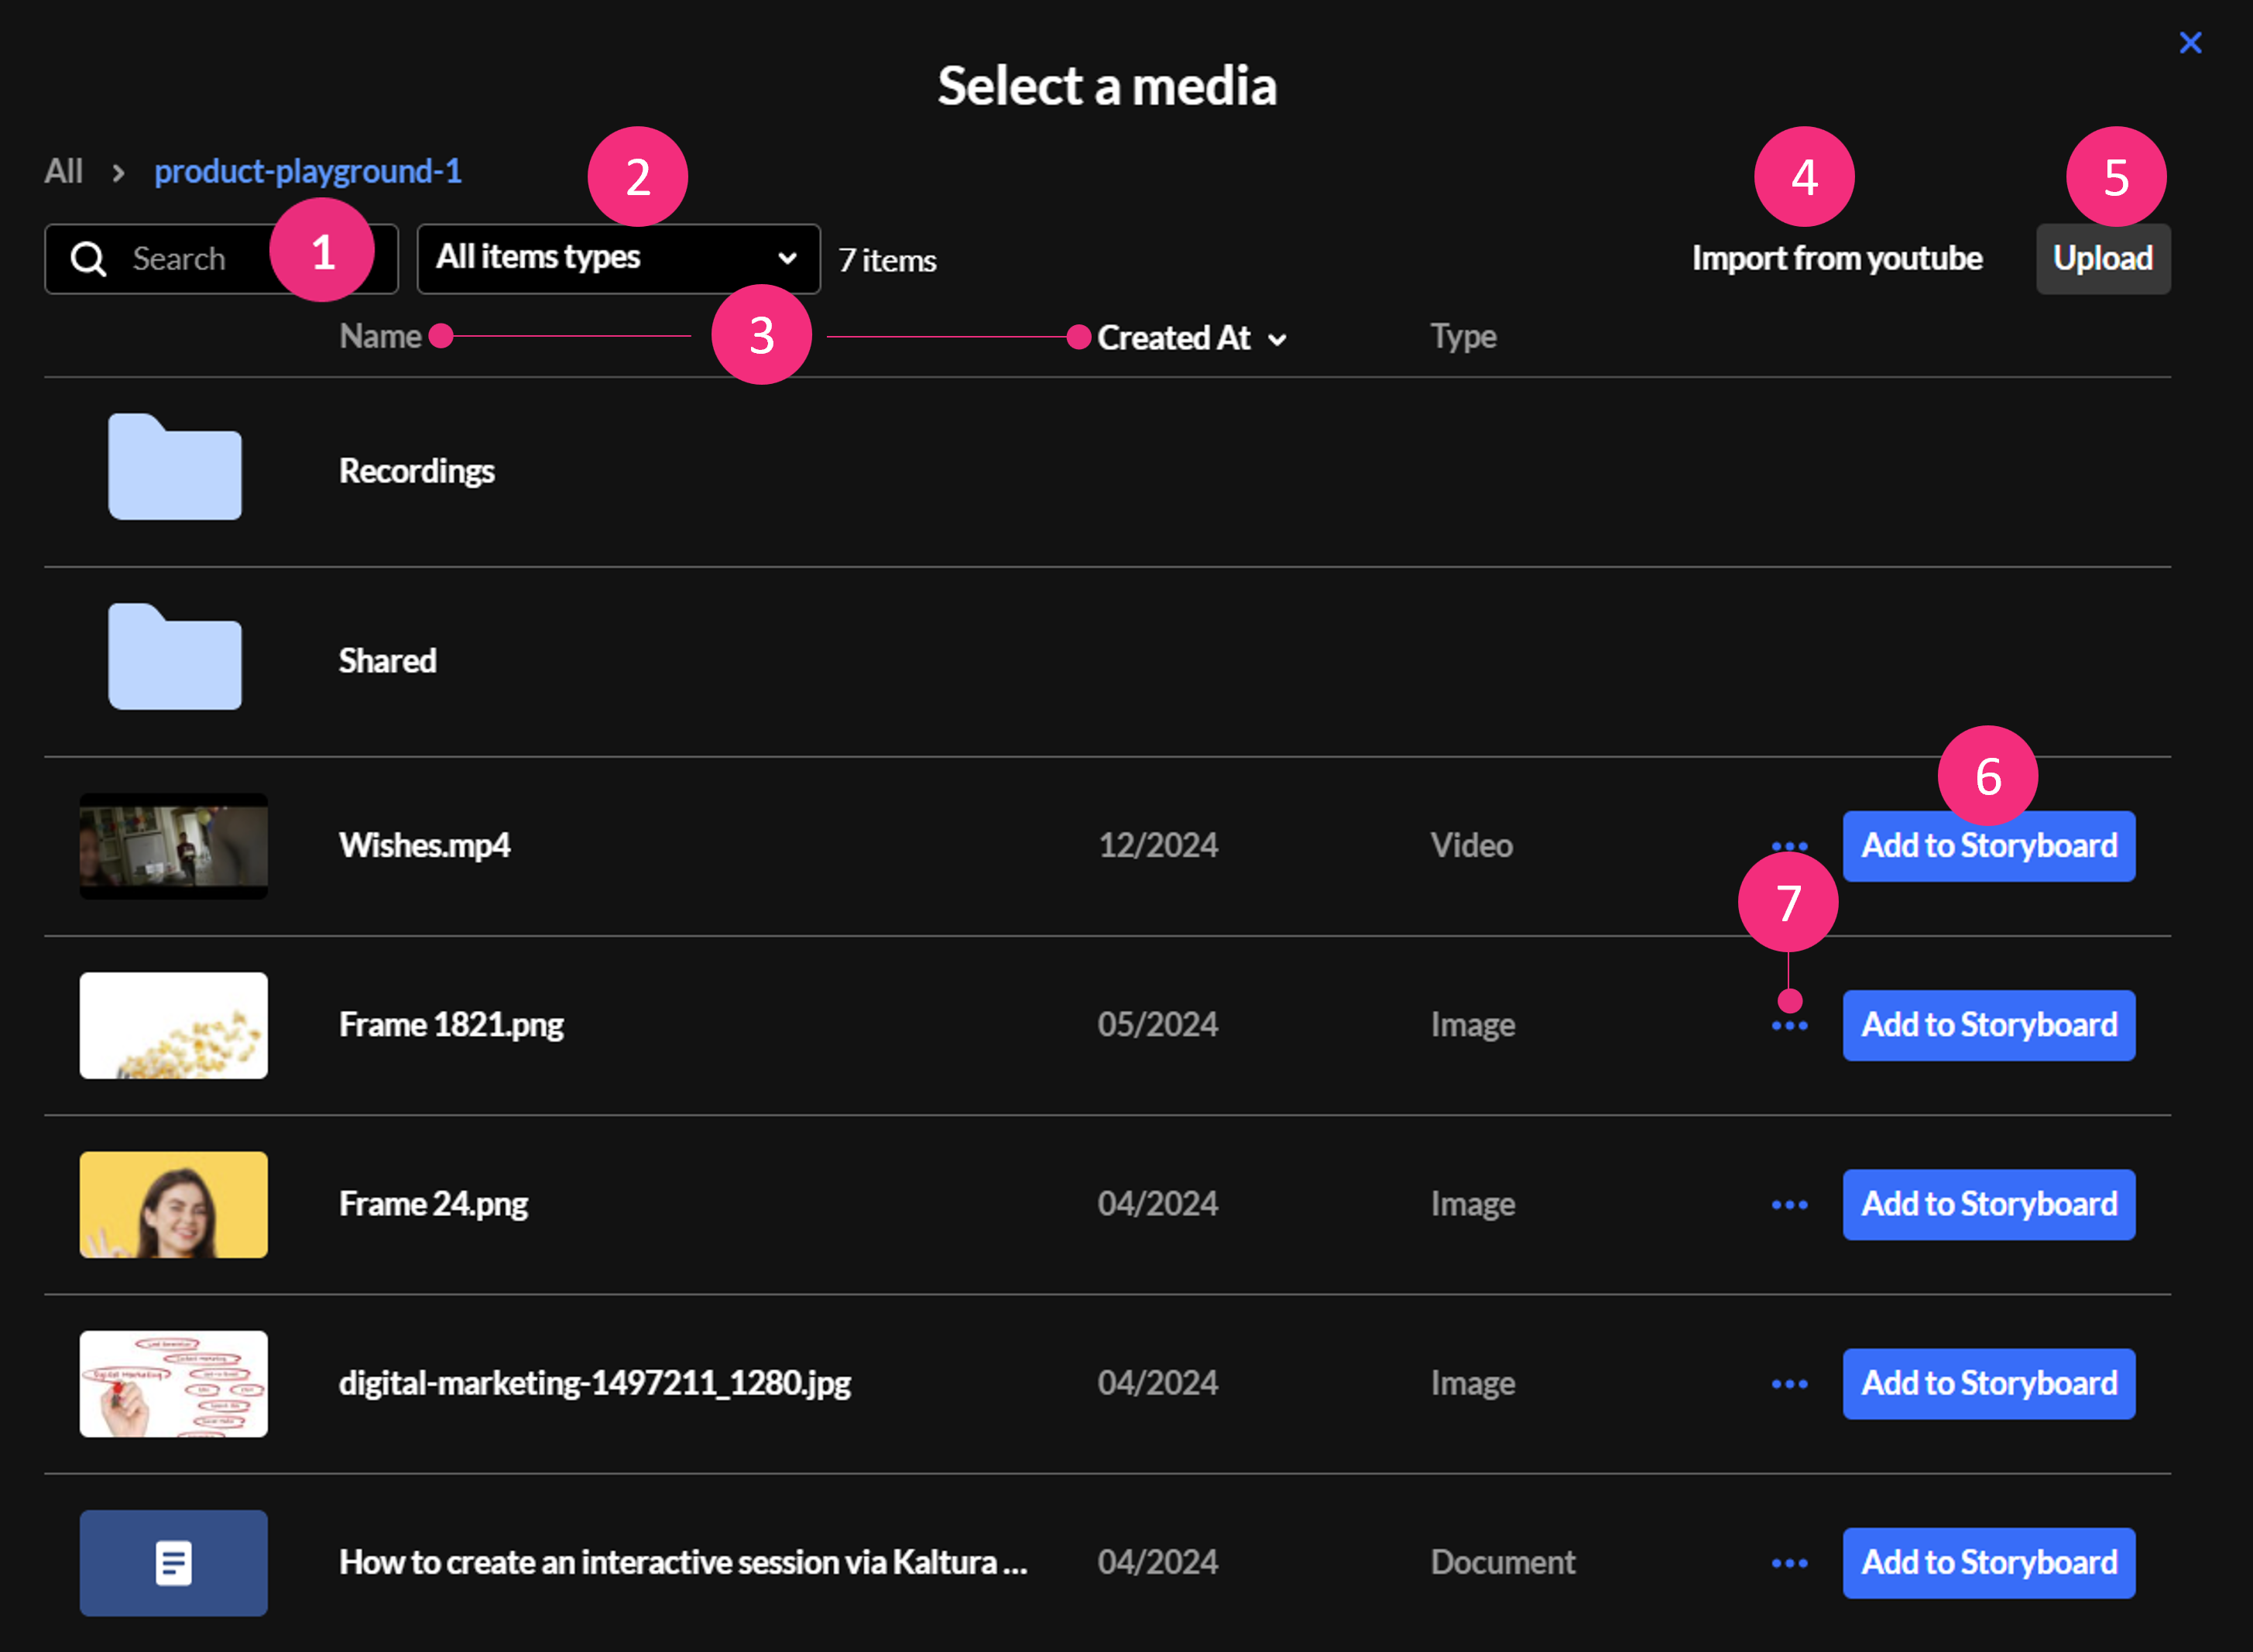
- You can use the search field to search for media.
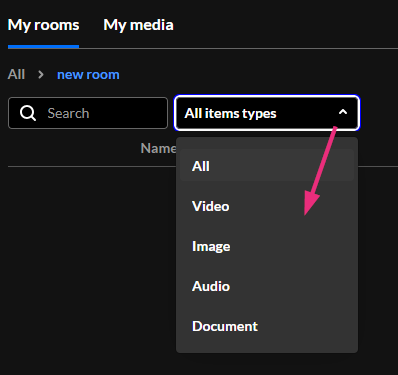
- Use the media filter to search for media by type from the drop-down options.
- You can also sort media according to name or date they were created by clicking on Name or Creation date.
- To import a YouTube video, click Import from YouTube.
- To upload a video from your computer, click Upload.
- Once you have located the desired media, simply click Add to Storyboard and it will be added to the storyboard (it will not start playing automatically). To learn how to manage files on the storyboard, see Kaltura’s article Storyboard.
- To delete a media item, click the three dots and select Delete.
How to Share Media from the Quick Share Menu
- Click the Share icon on the bottom toolbar. Three options display for sharing media: Video, Presentation or Image.
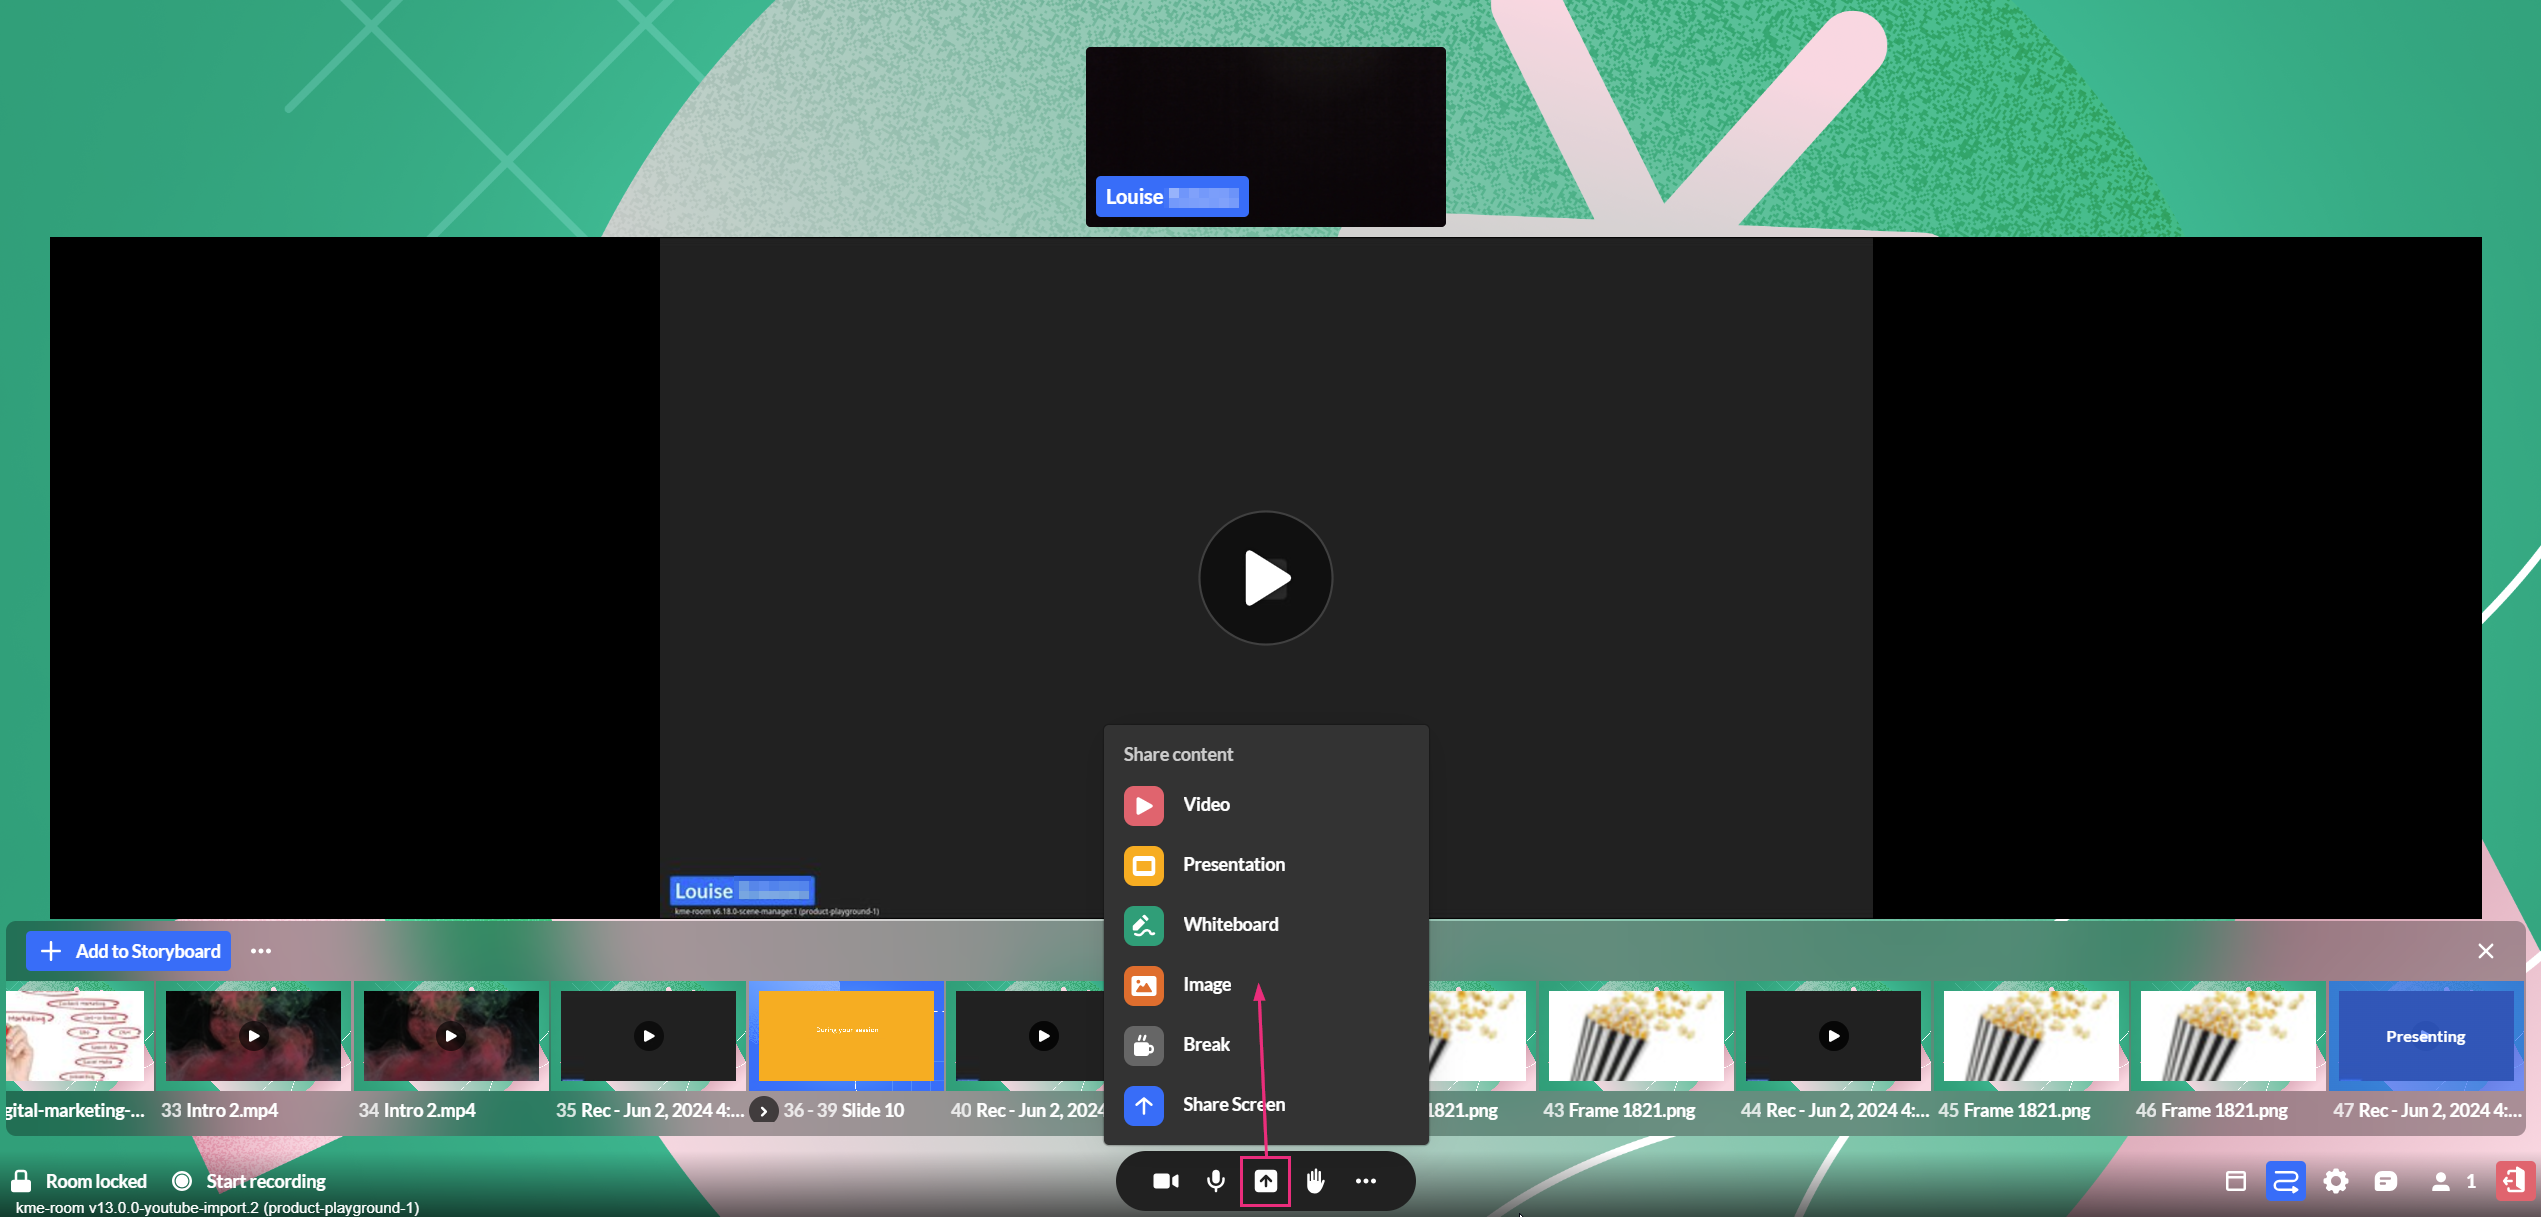
- Selecting one of the three options displays the Select a media window, which has the following features.
- Search — Use to search for a specific media item in the media manager.
- Name / Created At — Use to sort media items according to name / creation date.
- Import from YouTube (visible only for Video) — Click to import a YouTube video.
- Upload - Click to upload a video from your computer.
- Present — Click to add the media to the storyboard and start presenting it immediately (the Select a media window will close automatically).
For more detailed information about adding videos, presentations or images to the Media Manager visit the Prepare files for your Meeting page on the Kaltura Knowledge Center site or view this PDF.
Customize Your Room
Watch the 1:28 minute video below to learn how to change your room’s background and add lower thirds (on-screen labels).
For more detailed information visit the Customize your Kaltura Room in Video Portal webpage on the Kaltura Knowledge Center site or view this PDF.