Adding Dates and Release Conditions
Brightspace offers several ways to control what students can access in your course. You can set availability dates to control when content can be viewed, use release conditions so content becomes available only after specific criteria are met, or manually hide content until you’re ready to make it visible.
Availability Dates
In Brightspace, you can add Start Dates, Due Dates, and End Dates to modules, sub-modules, and content topics. These dates help communicate when students should review content or complete activities and can be used to guide students’ progression through the course.
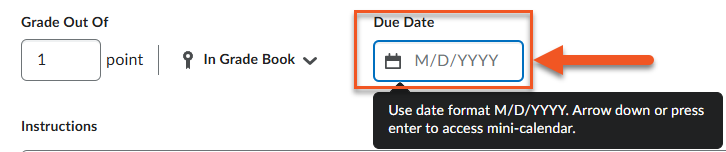
- Due Date: A Due Date indicates when an activity is expected to be completed and helps students manage their time, but it does not prevent access to the content.
- Start Date: A Start Date controls visibility, meaning students will not be able to see or access a content item until the start date has been reached.
- End Date: An End Date controls access, meaning students will no longer be able to see or access a content item after the end date has passed.
- To add a due date to a Unit (or Module)
- Click on the Unit and then the 3 dots (Options menu) in the top right corner and select Edit from the drop-down menu.
- Click on Add Due Date. Click on date box and select a date from the mini-calendar.
- To add a due date to a Content Topic
- Click on the Content Topic and then the 3 dots (Options menu) in the top right corner and select Edit from the drop-down menu.
- Click on the date box under Due Date and select a date from the mini-calendar.
- Click on the Unit or Content Topic
- Click on the 3 dots (Options menu) in the top right corner and select Edit from the drop-down menu.
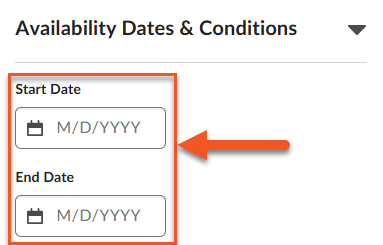
- Click on Availability Dates & Conditions.
- Enter a Start Date to determine when the content is visible to students.
- Either leave the End Date open or enter a date to restrict access to the content after a specific date.
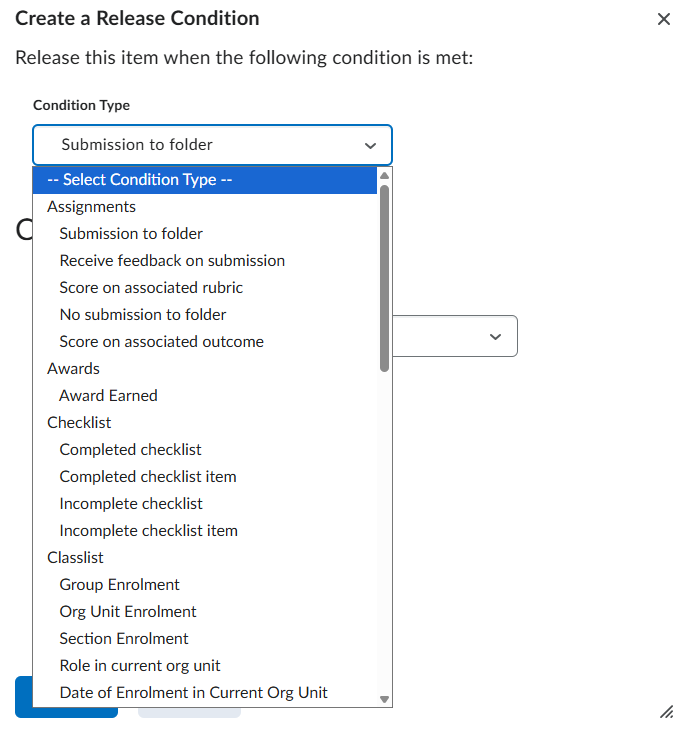
Release Conditions
Release conditions allow you to control when content becomes available to students based on specific criteria, such as viewing a content item, submitting an assignment, or achieving a certain score. This helps guide students through the course in a planned sequence and ensures they complete required steps before moving on. If you attach multiple conditions to an item, students must meet all conditions to access the item. See this page on D2L’s website to learn more about Release Conditions.
*Note: Once a user meets a Release Condition, the condition is cleared for that user and cannot be reset.
- Click on the Unit or Content Topic you want to add Release Conditions to.
- Click on the 3 dots (Options menu) in the top right corner and select Edit from the drop-down menu.
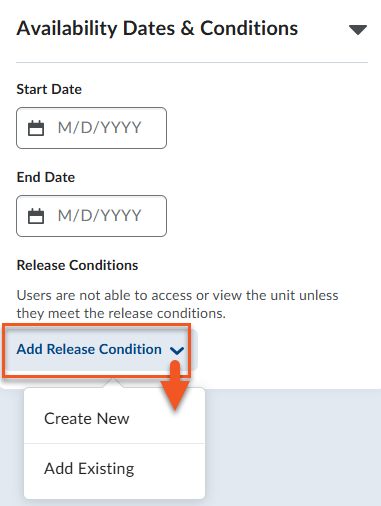
- Click on Availability Dates & Conditions > Add Release Condition. Either Create New or Add Existing.
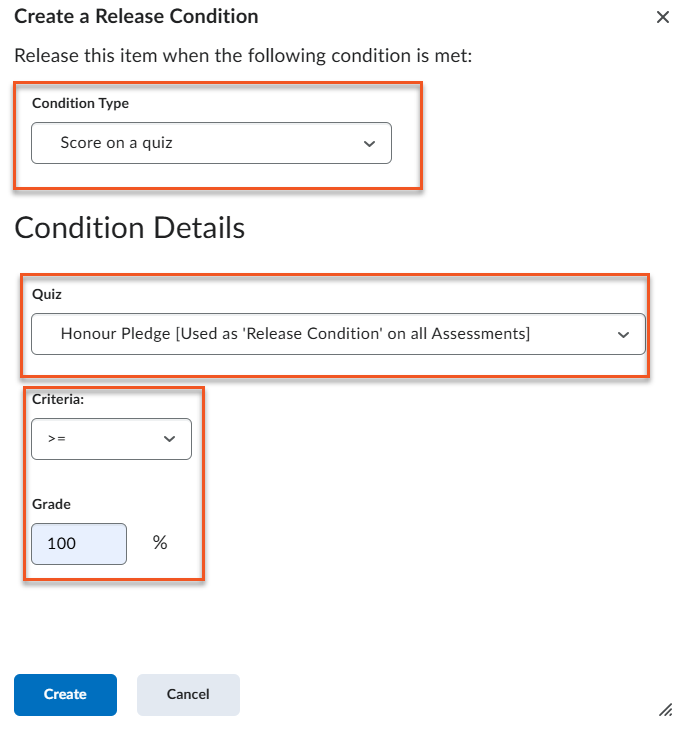
- To create a new Release Condition you must first select the Condition Type.
- Below is an example of a Release Condition that releases a Content Item based on a student’s score on a quiz.