Course Builder and HTML Templates
Using the Course Builder to build an outline or course skeleton is where the heavy lifting of course design happens. You can use the drag-and-drop functionality to create a structure for your course that outlines the topics and modules you want to cover in your course.
Creating a solid outline is a critical first step in designing an effective course as it provides a roadmap for the rest of the design process and helps ensure that all necessary topics are covered in an organized and logical way.
Course Builder
- Navigate to Tools > Course Builder
On the left side of the screen you’ll find tools and placeholders, the center of the screen is where you’ll build and on the right side you can fine tune things by accessing editing tools.

Brightspace: Overview of Course Builder Tool
- Start Building (Drag & Drop)
Choose components, such as modules, HTML pages, assignments, quizzes or discussions, from the menu on the left-hand side and drag them into the center. From there, you can customize each component, such as adding content or setting due dates. The drag-and-drop makes it easy to build from scratch or add new components to an existing course.

Don’t put significant content on Module (Unit) fronts as it’s not tracked in the Class Progress tool and it doesn’t show up in the Pulse App (Brightspace’s mobile app). Instead add a banner image and a content listing of what is in that unit — this syncs with the Visual Table of Contents on the Course Homepage.
HTML Templates
Using HTML templates saves time and maintains consistency in course design by providing pre-designed layouts and styles that can be easily customized and reused across multiple courses. Additionally, HTML templates can help ensure accessibility and responsiveness across different devices and platforms.
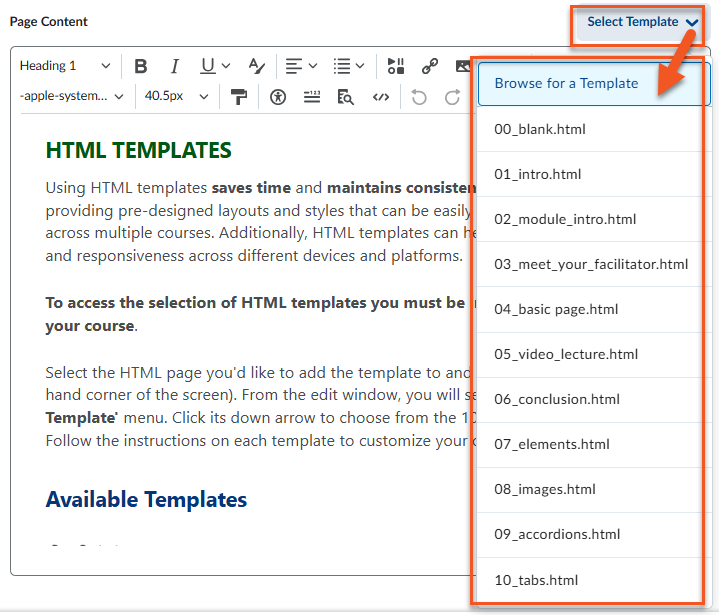
To access the selection of HTML templates you must be in the ‘Content’ area of your course.
Select the HTML page you’d like to add the template to and click edit (3 dots in right-hand corner of the screen). From the edit window, you will see the blue ‘Select Template’ menu. Click its down arrow to choose from the 10 available templates. Follow the instructions on each template to customize your content.
Available Templates
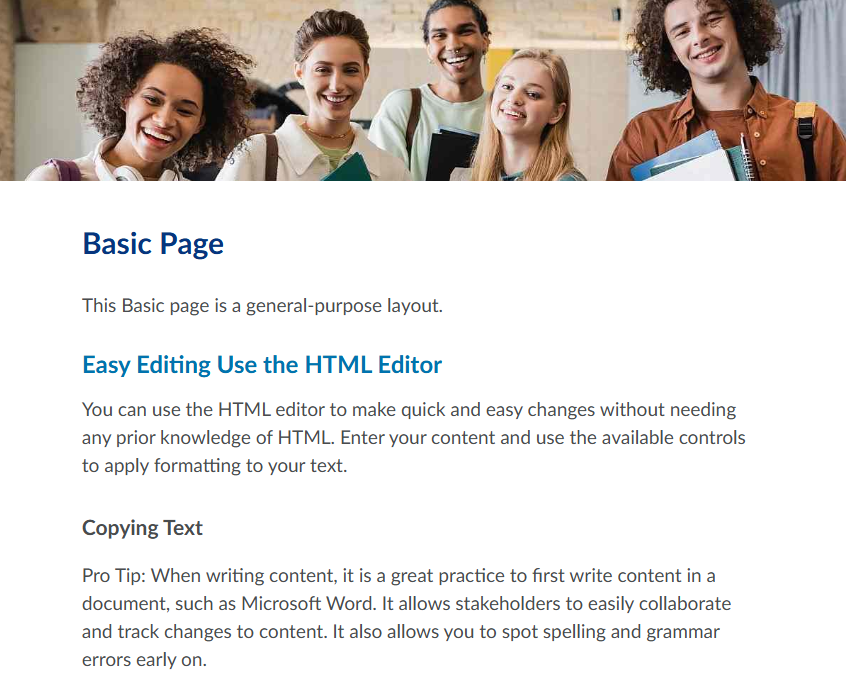
Example of the Basic Page HTML template below. It includes a banner image across the top, a main heading, a sub-heading and instructions on copying and pasting text.